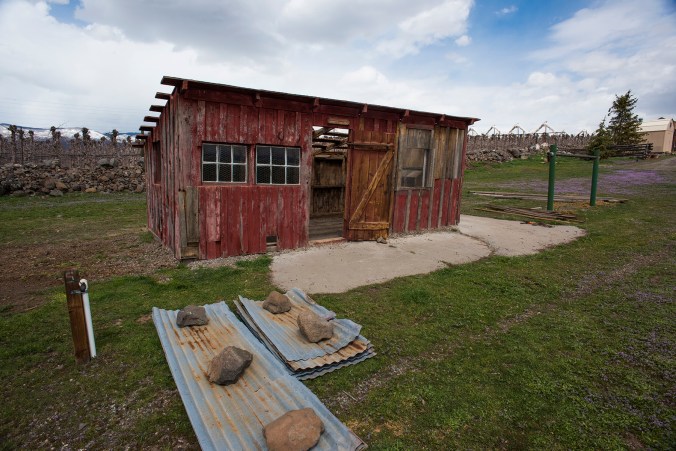
One of the many reasons we were drawn to Quiet Farm was its collection of rather ramshackle yet usable outbuildings. Since keeping chickens for eggs (and entertainment) was always a top priority, renovating the chicken house was definitely high on our project list.

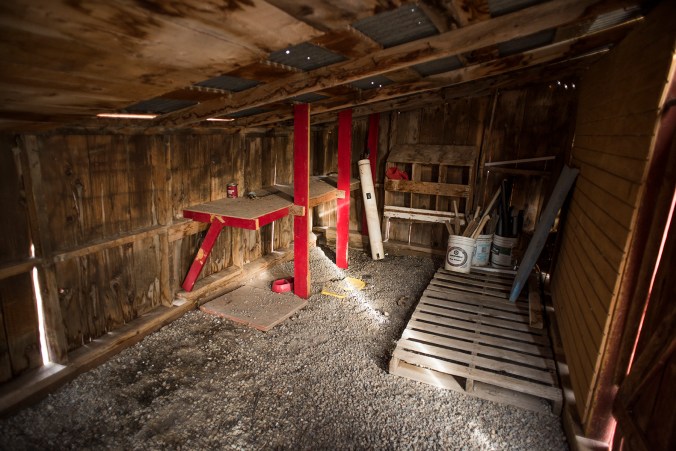
The ‘before’ photo, in bleakest winter.
The original nest boxes on the far wall indicate that this may previously have been used as a henhouse.
Although the chicken house was moderately sturdy, it definitely called for renovation before we brought hens home. The roof required replacing, the foundation needed to be defended against predators and the interior demanded a good cleaning.

With the roof removed and much of the junk cleaned out.
Repurposed corrugated steel panels ready for the roof. They’re weighed down with rocks so they don’t blow away.
Our goal with all of our renovation projects is to salvage and repurpose materials whenever possible, and to learn something as we do it. It would be much easier to accomplish everything by constantly buying new supplies at the big-box home improvement stores, but that level of excessive consumption doesn’t fit with our lifestyle and typically stifles creativity, as well. We’re trying hard to do as much as we can with what we have on hand.

How to install a chicken house roof, in four easy steps.
After removing the existing roof, we laid plywood sheets, covered them with tarpaper, then reinstalled the metal panels. Here’s a pro tip: don’t try to do this on a windy day; we nearly donated all of our roofing materials to our neighbors. Thus far the roof has remained perfectly watertight, but winter will be the real test, especially if we have the heavy snowfall we experienced last year.
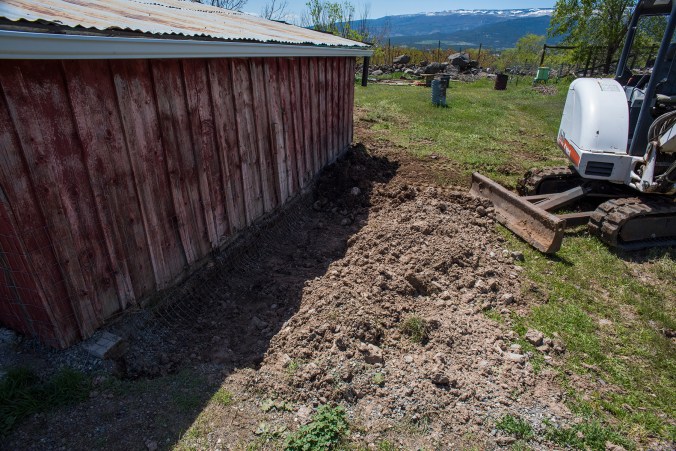
Trenching the chicken house to bury wire.
There are many, many creatures here who would love a fresh chicken dinner, so keeping the chickens both dry and safe is essential. Because raccoons, foxes, skunks and whistle pigs can all dig, we trenched around the house and buried wire fencing about a foot deep. The fencing is also secured two feet up the walls of the house.
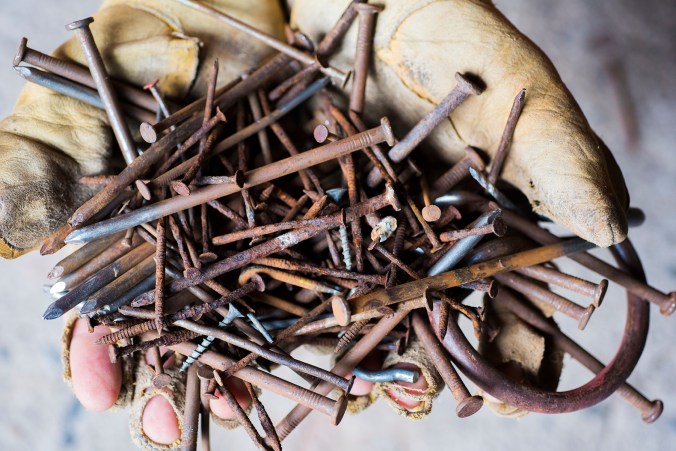
Just some of the hardware discovered during this project.

Our roost, built from repurposed lumber.
Nearly finished!
We bought old windows from a nearby vintage shop and installed them to provide both light and ventilation. It’s actually much more difficult to keep chickens cool than warm; their feathers provide natural insulation and they don’t sweat like humans do, so it’s imperative that they have access to fresh air when it’s hot. On the other hand, cold, damp drafts can make them sick, so the house needs to be pretty airtight during winter.

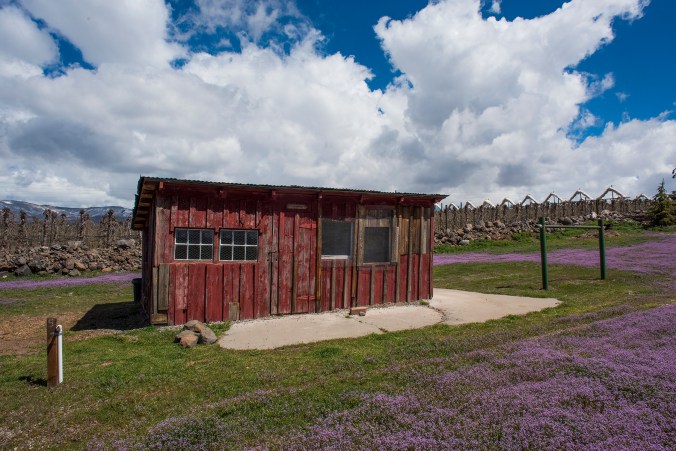
All done except for paint. The lush growth and gorgeous light proves this is a spring photo.
We collected rocks (we have plenty!) and stacked them up on top of the wire mesh around the base of the house for an additional layer of protection against digging predators. The old wire spools and branches provide shade and shelter for the birds.
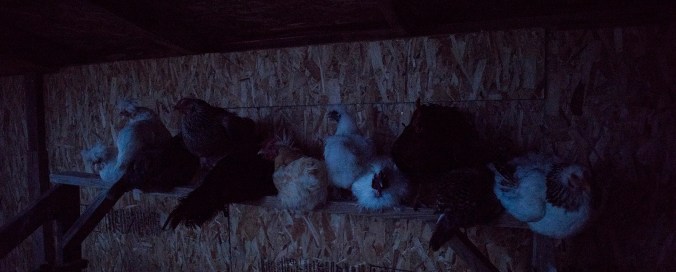
Twelve chickens, tucked up snugly on the top roost bar.
Chickens like to sleep on an elevated perch; they’re descended from jungle fowl, so they’d naturally sleep in trees. Our roost has four bars, but invariably most of the birds end up on the top rung, with one or two lower-ranking birds on the next rung down. Remember, pecking order is a very real thing, and every chicken knows exactly where they fit in the hierarchy.
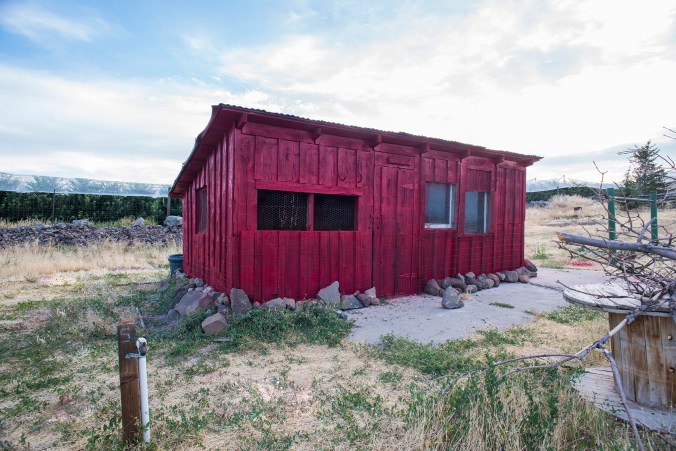
Freshly painted with a new coat of sharp red paint! (Look closely to the right of the house and you can see where the paint sprayer exploded.)
Our final task was to give the house a fresh coat of paint, both for aesthetics and to protect the aged wood from our harsh weather. Our trusty paint sprayer didn’t like the thick exterior paint or the extreme summer temperatures, so there’s quite a lot more red paint “decorating” the area than we’d like. Nevertheless, the refurbished chicken house is keeping our birds safe, protected and dry and hopefully will for years to come.
Next up on the project list: lots of canning and preserving, plus installing our beetle-kill floors in the master bedroom and closet. Always something in the works here on Quiet Farm!

nice work Elizabeth
Shalom,
Valerie
LikeLike
Thank you, Valerie!
LikeLike
Looks great! Does the bright color help keep predators away at all?
LikeLike
Hi Sara! That’s a great question. I don’t think the red deters predators; most of the potential chicken thieves are nocturnal, so I suspect the color wouldn’t have much impact. But we do use red feeders to attract our hummingbirds, so color definitely has relevance for some animals and birds. Thanks for reading!
LikeLike
What a Great Job!! I used to think repurposing (wood especially) was ssooooo tacky, but it really saved me $$$ when I used our old back porch floor for my 2’x4′ raised beds. Made 8 of them and 1 2’x2′. The different colors make them very festive!
LikeLike
Thanks, Susan! We are really making an effort to repurpose what we have or search it out secondhand locally. It saves money and helps at least a little with the endless supply of materials ending up in the landfill.
LikeLike
Was going to ask where you got all the rocks, but you covered that. If you two ever run out of things to do on Quiet Farm, you can always contract out. You guys do good work!!!
LikeLike
Thanks, Jim! We think the work you’ve done at your place looks pretty spectacular too.
LikeLike
Pingback: Chick lit | Finding Quiet Farm