Who remembers way, way back in April when we purchased beetle-kill planks for the master bedroom and closet? Not us. And who remembers back when building and installing custom bookshelves was the trickiest project we had taken on? Apparently we forgot about that, too. Let us say frankly that laying this pine flooring is by far the most infuriating, the most frustrating, the most demoralizing task we’ve ever tackled here at Quiet Farm. Oh, I know I say this about every project but I am not joking here.

The planks are “curing.” (They’ve been abandoned in favor of other projects.)
The best thing about this flooring project is 1. it’s finished (mostly) and 2. we learned so, so much about flooring and our own tolerance for suffering. It’s such an honorable, martyr-ish, humble-brag thing to talk about how you renovated your entire antique farmhouse yourself, but this project was truly the closest we’ve come to calling in a professional to bail us out of the mess we’d created. But since you’re already here, friends – who doesn’t like to read about other people’s DIY trauma? – let’s share what we’ve learned.
Yes, we had to move all of the planks repeatedly. No, that wasn’t at all tedious.
Lesson #1: There is a reason that raw wood (like these pine planks) has been mostly abandoned in favor of engineered or manufactured hardwood. The giveaway is in the name: engineered wood is precisely custom-cut and layered so that each plank is identical and fits together perfectly. Raw, untreated wood is obviously cut from what was once a living thing, and like all living things it has imperfections. These imperfections are gorgeous in a forest, but infuriating when you’re trying to snap them together on an already-uneven floor. All the various imperfections we encountered in the wood (major warping) and in our foundation and walls (not remotely straight or level) didn’t cancel each other out – they multiplied. As N swore during one particularly tough day, never again are we flooring with raw wood. It looks amazing, but the appearance isn’t worth the puzzle-fitting and the stress.

Look! It’s really pretty firewood!
Lesson #2: When working with raw wood, especially a soft wood like pine, you’ll need a lot more overage than you think. The industry standard of ten percent will not – I repeat, will not – cut it. We spent an inordinate amount of time sorting through planks to find usable pieces, and as a result we have a great deal of scrap. Beetle-kill pine especially is replete with cracks, knots, scars and other damage, as you might expect, but we didn’t know this in advance and as such didn’t order enough wood the first time. When we finally figured out that we wouldn’t have enough wood to complete the closet, we wrestled with installing uncured wood (i.e. it hadn’t sat in the bedroom collecting dust for six months) in order to just get the project done. (You may notice there are no photos of the closet. This is intentional.) We wish our lumber yard had told us in advance that we’d need a minimum of 25% overage, but we’ll chalk that up to a valuable lesson learned.

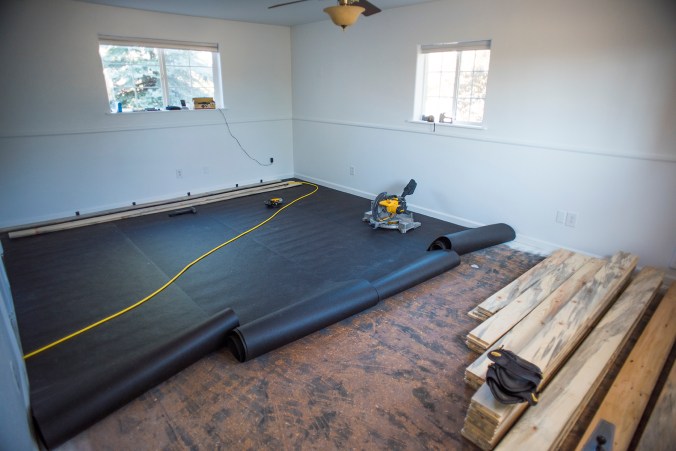
It took approximately a decade to progress this far.
Lesson #3: Renting tools is practical for some projects and not at all for others. We rented a skid steer and an excavator when we built the game fence; these are not tools we’ll use on a daily basis and they’re extremely expensive to purchase. For this flooring project we started out renting a floor stapler from our local hardware store, foolishly thinking that we’d be done in a day or maybe two at the most. When by the end of our first day we had only laid about six rows – because fitting the planks together was so challenging – we realized that at our current productivity rate, we could buy about twenty floor staplers for the inevitable cost of the rental. So work stopped yet again while we waited for our newly-purchased floor stapler (and tiny pancake compressor) to arrive. If we had known this in advance, it would have saved us a ton of wasted time and the money spent on the rental.

Lesson #4: When installing flooring, figure out your transitions in advance – not after everything is installed and you’re forced to custom-build transitions. Not only are there no photos of the closet, but there are no photos of our transitions, either, and that’s because we haven’t yet figured out how to solve this problem. We have to transition between the existing ash hardwood in the main entrance to the bedroom, between tile at the bathroom, and from pine to pine at the closet. Seems reasonably simple, right? OH NO YOU ARE SO WRONG. Because we didn’t plan our transitions in advance, we have what N graciously calls a “sawtooth profile” on the pine planks, making fitting a transition in almost impossible. And did we mention the floors are varying heights? So we need step-downs and reducers, too, all in bespoke sizes and cuts. The lesson here is to make your transitions the first step in your flooring project, rather than the last. We won’t forget this lesson anytime soon, and please, watch your step.

The before, middle and after. Burgundy carpet and periwinkle paint may be great for some people! But not for us.
Lesson #5: Everything will take twice (or ten times!) longer and cost plenty more than you think. This old DIY adage should be common knowledge for us by now, but we’re still learning. This might be our third floor (our sunroom and our living room look beautiful!) but it was with an entirely new material, and one that we probably should have researched a bit more in advance. The floor is in, and it looks gorgeous, and we’re so pleased with it, but it didn’t come without plenty of sweat and tears and temper tantrums. With every single project, though, we learn and we progress and we become better and better. And that’s all we can ask for.

Looks great!! I know it was a labor of love. You should be so proud.
LikeLike
Thanks, Sara. Labor of madness is more like it. 🙂 But we are proud.
LikeLike
Beautiful!
What will you do with the scrap? A sacrificial burning? : )
LikeLike
Hi Maggie! Although I would love to light a fire with the scraps – I do adore ceremonial burns – we’ll probably save them for future projects. We have a surprisingly large need for shims in our rather lopsided house, and it’s always helpful to have scrap wood around. Thanks for reading and hope you’re well!
LikeLike