We’ve been honest about the fact that we don’t eat many sweets here at Quiet Farm – our tastes definitely lean more towards the salty and savory. That said, when we do have a sugar craving, we’re seeking something spectacular, rather than something merely mediocre. Dry, tasteless storebought cookies? No thanks. Artificially sweetened plastic-wrapped gas station pastries? Absolutely not. Homemade millionaire’s shortbread with a hot cup of coffee? Yes, please.
What’s that, you say? You are an American raised on Twix bars and you have never in your lifetime heard of this mysterious thing called millionaire’s shortbread? Well, please allow your intrepid guides to introduce you to this magical sweet. The name millionaire’s shortbread apparently originates in Scotland (totally unverifiable), and refers to the unbelievably rich layered combination of shortbread crust, sticky-sweet butterscotch caramel, and chocolate. The confection, also known as caramel slice, caramel shortbread or caramel shortcake, is well known in Britain and Australia but not so much here in the U.S. (Unless of course it’s packaged and called a Twix bar.)

This version, lightly adapted from this Bon Appétit recipe, is jokingly referred to as billionaire’s shortbread because it incorporates both whole sesame seeds and tahini, exotic (and somewhat pricey) ingredients. Tahini is simply sesame seed paste, and it’s commonly found in savory Middle Eastern cooking – notably hummus. Of late, however, many pastry chefs have started incorporating it into desserts, and I am all for this trend. There is no denying that millionaire’s shortbread is almost teeth-achingly sweet, with the decadent combination of shortbread, caramel and chocolate, and the tahini (as well as the toasted sesame seeds in both the shortbread and sprinkled on top) cut that richness. I like the crunch, the textural contrast, and the slight bitterness the sesame seeds bring to the party.
Pre-made tahini is surprisingly costly to purchase, but it does keep forever if refrigerated and it is a terrific addition to salad dressings, bean dips and certain baked goods. If you are the sort of person who already makes your own nut butters, preparing your own tahini will be an easy step – simply puree raw sesame seeds in your high-powered blender much as you might almonds or peanuts. As with all nut and seed butters, tahini is likely to separate after a time, so always give it a good stir to re-incorporate the oil that might have settled on top.

Tip the crumbly dough into the pan, then press into an even layer and pierce with a fork.
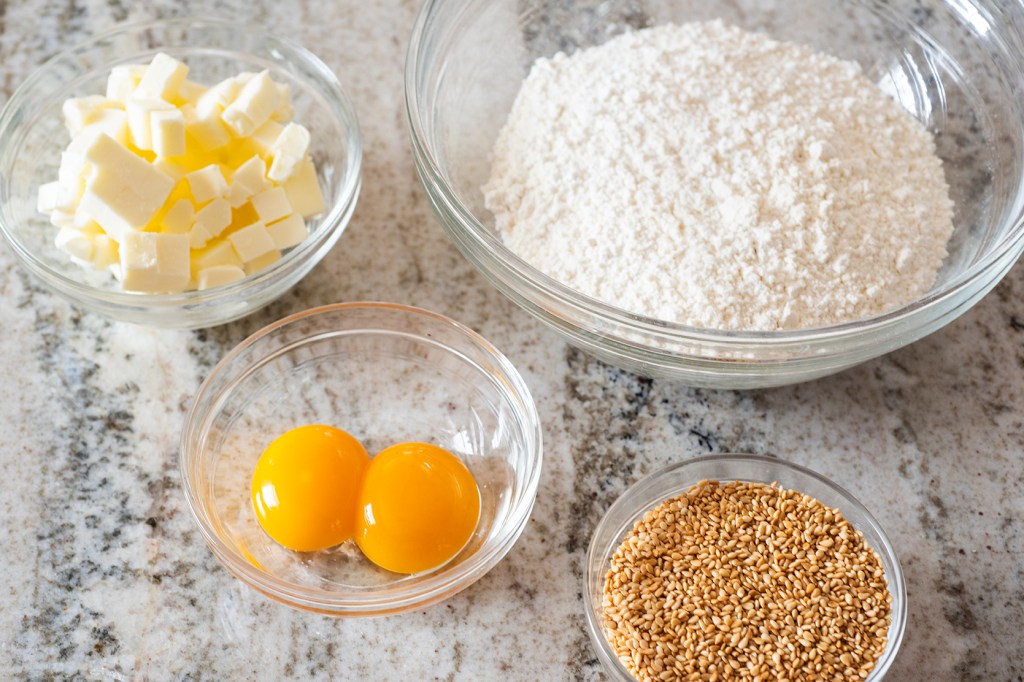
Ready to tackle this? Let’s go. As always when baking and cooking – especially when you’re trying a new and/or complicated recipe – it’s super-helpful to put together your mise-en-place, which is a simply a fancy French culinary term meaning “to put in place.” I like to use the glass bowl set shown in these photos to assemble all of my ingredients; setting things up in this fashion also helps if you get distracted midway through, because you can see at a glance if you’ve added all of the required ingredients. “Did I add the salt yet, or not?” is not generally conducive to successful baking.
If it’s your first time making shortbread, here are a few tips: 1. Make sure your butter chunks are good and cold; I chop the butter then pop it into the freezer until I’m ready to use it. 2. Don’t overmix the ingredients; they won’t be homogenized (see bits of golden yolk above) and that’s just fine. 3. When you press the dough into the pan, use some effort so it stays together when you cut it later. (Also, please note that the binder clips in the photo above are simply used to keep the parchment paper in place while preparing the dough. They do not go into the oven!)
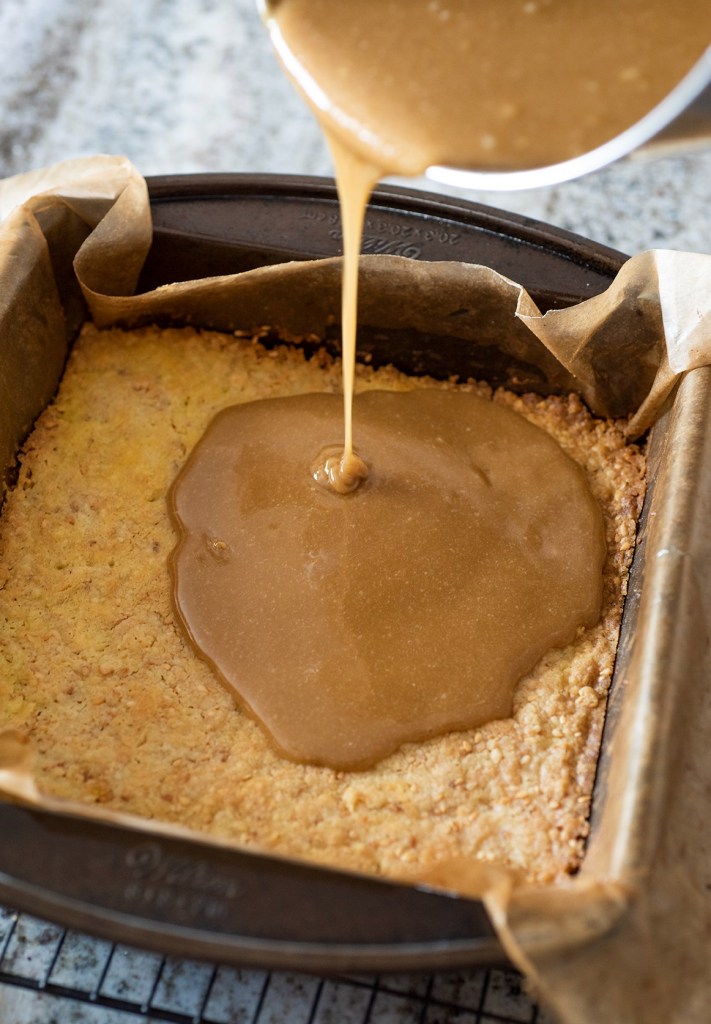
Once your shortbread crust is baked and cooled, you’ll pour the caramel layer on top. This recipe calls for a simple caramel that doesn’t require a candy thermometer, but caramel still takes a bit of experience. Whenever you’re making any caramel, use a larger, deeper pan than you think is necessary, because the mixture always wants to boil over. Remember that if you’re baking at altitude you actually want to cook the caramel a bit less, since the lower air pressure means that water boils at a lower temperature here (and water evaporation is key to making successful caramel). Also, caramel (and candy-making in general) really isn’t a kitchen activity for kids; the risk of severe sugar burns is pretty high if you’re not careful.
No no no! Don’t do it like this!
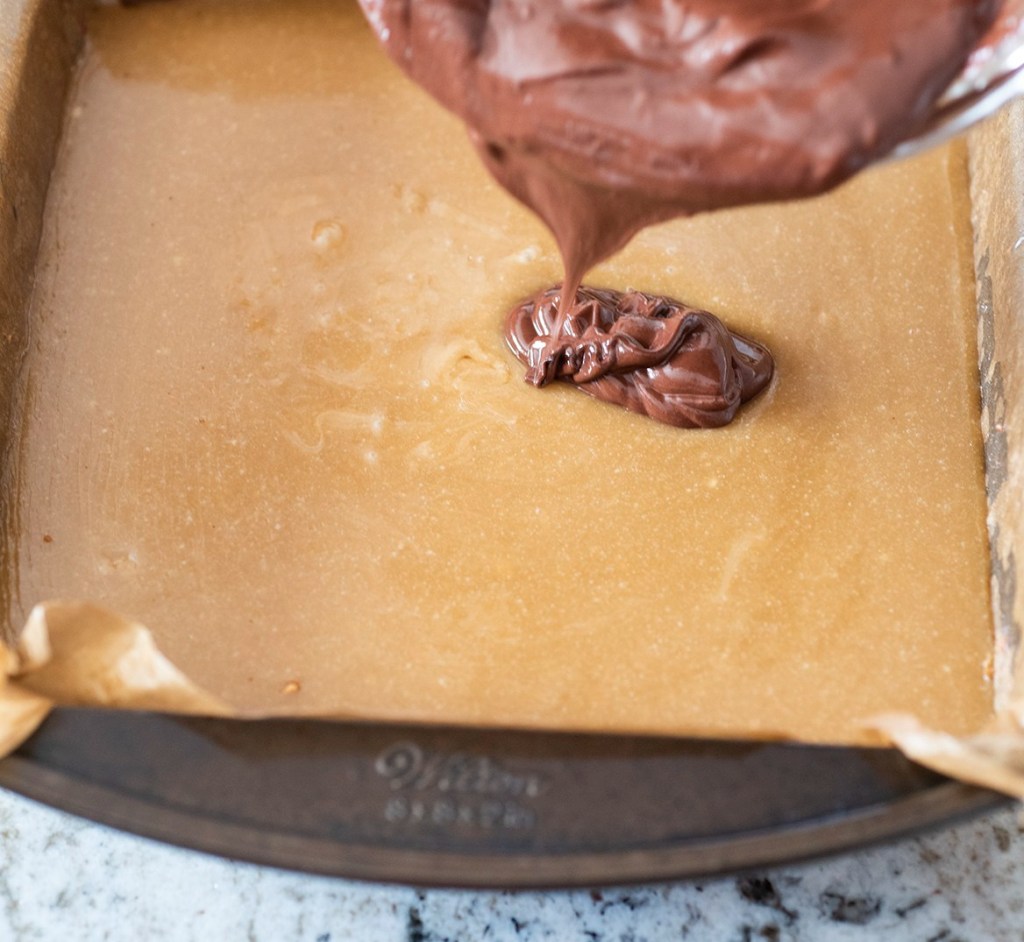
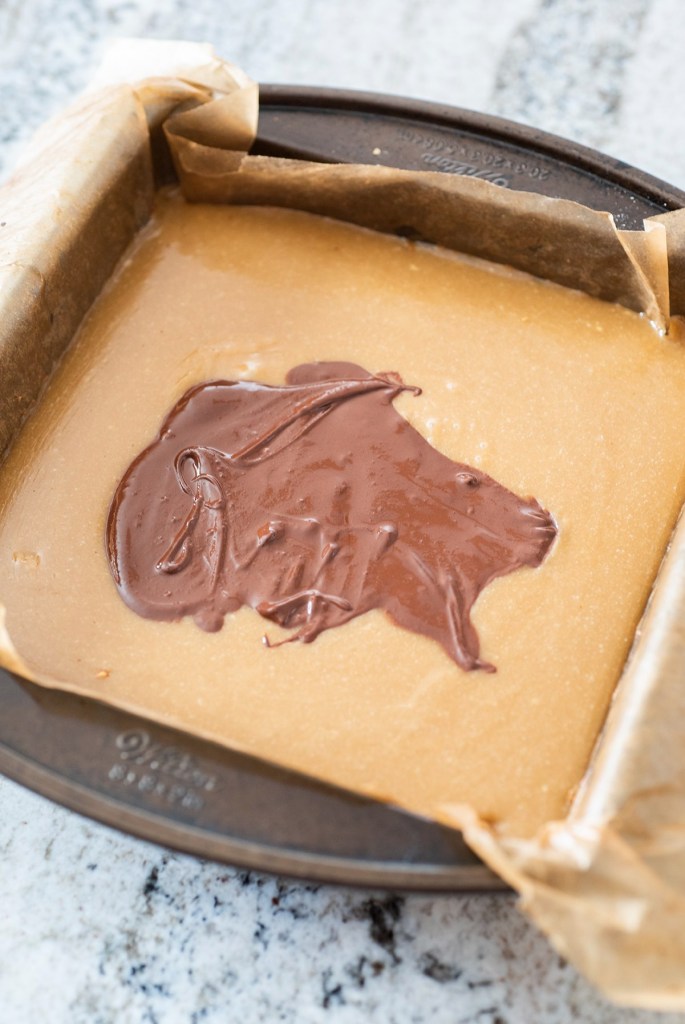
Here’s a pro tip: make absolutely sure that the caramel layer is thoroughly chilled before you pour the melted chocolate on top. In the photos above, you can see that the chocolate is actually sinking into the caramel, rather than spreading out smoothly. Do not skimp on chilling the caramel and shortbread; you can even tuck it in the freezer for a few minutes, just make sure to keep the pan level so all the warm caramel doesn’t slouch to one side. And when you’re melting chocolate, avoid using chocolate chips. These are specially formulated not to melt, since their whole point is to stay whole in cookies and the like. Buy a stash of good-quality chocolate bars and when you need melted chocolate for a recipe, chop into chunks and melt gently in a glass bowl set over a pan of simmering water. (I am not a fan of melting chocolate in the microwave; I think it runs the very real risk of burning the chocolate.)
This happens surprisingly quickly! Don’t walk away.
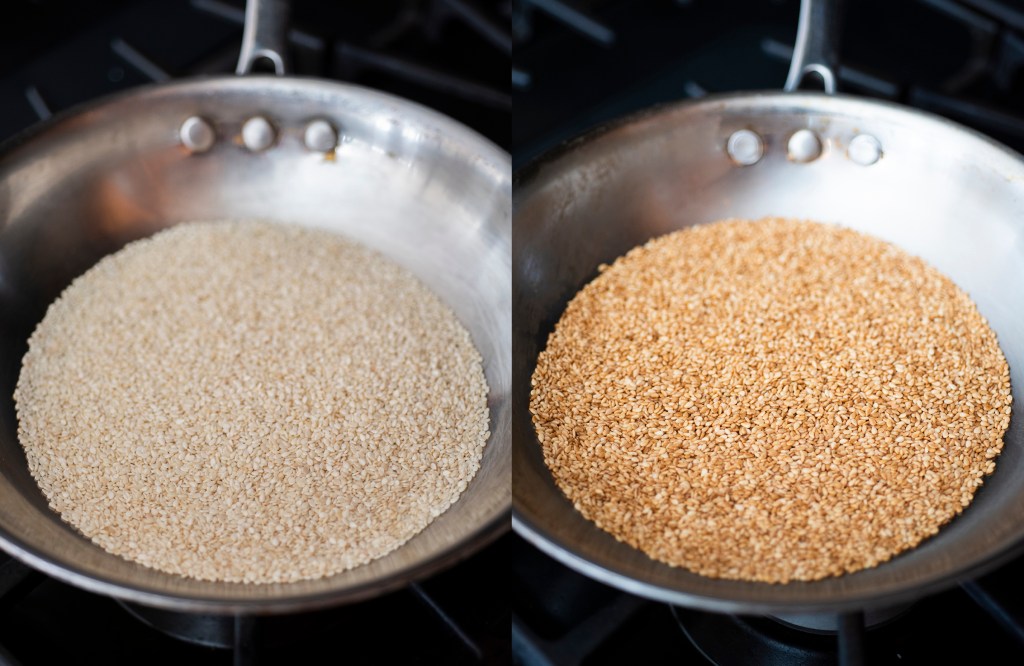
Any time you use nuts or seeds in any format, be it in baked goods, sprinkled on a salad, or in trail mix, know that they’ll be much more flavorful if toasted first. Many recipes call for using the oven to toast a sheet pan of nuts or seeds; from long experience, I can tell you that this is a great way to burn twenty dollars’ worth of pecans. I always, always dry-toast my nuts and seeds in a shallow frying pan on the stovetop, where I can babysit them carefully. Depending on the variety, nuts and seeds can go from pale and raw to charred and ruined in a matter of seconds, and the oven doesn’t allow me enough control. Also, once the nuts and seeds are toasted to the level you’d like – taste them! – make sure you transfer them from the hot pan to a plate and let them cool completely. There will be enough residual heat in the pan to keep on cooking, and you might find they’re burnt anyway.

Almost ready to enjoy…but needs some salt on top.
Once you’ve poured and smoothed the melted chocolate, the pan goes back into the fridge for a final set. Feel free to sprinkle with flaky sea salt in addition to the toasted sesame seeds, if your fancies swing that way. When you’re ready to cut the millionaire’s shortbread, gently lift the entire mess out of the pan using the parchment paper as handles, and set on a cutting board. Use a serrated knife and saw into small squares; a chef’s knife, no matter how sharp, will press down on the bars and cause the caramel to squish out.
These are unbelievably rich and sugary, and you really only want a tiny piece. We keep ours in a covered container in the fridge for better texture and longer shelf life; I actually cut the entire tray into tiny squares and freeze most of them, so we can have a small treat as and when circumstances call for it. Millionaire’s shortbread isn’t an everyday pleasure, but it’s lovely to have a little bite of something sweet every so often.

So rich! So delicious! Enjoy with strong, hot coffee.
Have a good week, friends, and perhaps bake yourself a treat, too.
P.S. If you’re not feeling the tahini in this variation, you can find a more traditional millionaire’s shortbread here, here or here. Please note that we have tested none of these!

Did you make any high altitude adjustments based on this recipe?
LikeLike
Hi Angie! I’m at 6,300 feet and cooked the caramel just a touch less than indicated. I didn’t make any adjustments to the shortbread. The time required for making caramel depends on the size of the pan you’re using and how hot the stove is, as both contribute to faster evaporation, so it’s tough to pinpoint exact timing. In the original recipe it directs you to cook the caramel until “it coats the back of a spoon,” which I think is a pretty good guideline. I hope this helps – please let me know if I can clarify further. Thanks for reading and hope you’re well!
LikeLike
I like the way you put the ingredients in order before making the recipe. I have started to do the same recently and it really seems to help me with the timing of a recipe. The shortcake sounds like a really sweet treat!
LikeLike
Thanks, Susan! Yes, I think getting all of your ingredients together before you start cooking or baking makes things so much easier. It’s a classic culinary school trick and you always see it on television cooking shows, too. Hope you’re well!
LikeLike