The first time we walked into our old house, the one we sold last year, we fell hard for the woodburning stove and the built-in bookshelves. We don’t have a woodburning stove here at Quiet Farm – hell, we don’t even have a furnace – but we have the opportunity to make our own custom built-in bookshelves. And so we did.
Here’s how this project went in my head:
- Look at gorgeous photos of floating bookshelves on design blogs.
- Buy authentic vintage distressed barnwood and artistic handmade wrought-iron brackets.
- Attach aforementioned barnwood and hardware to wall.
- Fill with carefully curated books, black-and-white photos and trendy succulents.
- Admire. Photograph. Repeat. Earn generous sponsorship from major power tool companies. Probably succulent companies too. Quit farming to run profitable design blog. Live happily ever after.

Our library, pre-shelving. Don’t judge the brassy ceiling fan; it will be replaced eventually.
Here’s how the project actually went:
Look at gorgeous photos of floating bookshelves on design blogs.
Price authentic vintage distressed barnwood and artistic wrought-iron brackets. Realize that shelves will cost upwards of $3,000. Backtrack.
Choose different wood and lower-priced brackets.

Sanding the planks.
Endlessly search for wood. Finally drive one hour to local lumber yard. Try to convince salesperson that yes, we want Douglas fir and please stop showing us particle board. “You know this is just for framing, right?” We do. Thank you. Arrange to have “framing lumber” delivered. Delivery truck gets stuck in our snowy driveway. Choose not to interpret this as a harbinger of doom. Make mental note to revamp Snow Management Plan.
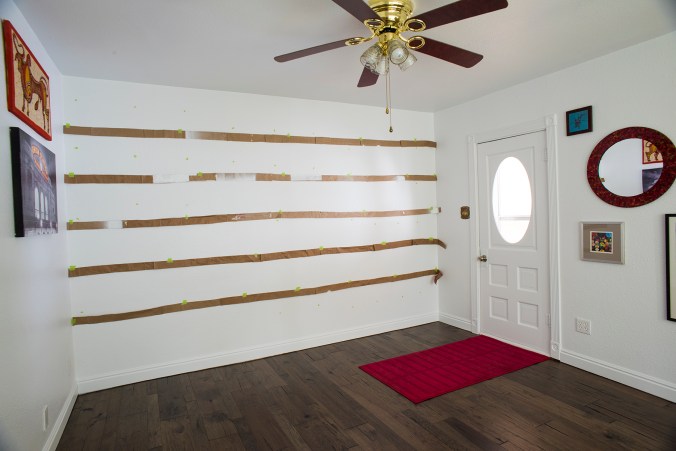
A rough paper template of the shelves on the wall.
Let lumber cure (translation: put off shelving project due to abject fear).
Sand shelves, being careful to let the beautiful grain and saw marks remain.
After hours of Internet research, find stain of choice. Buy stain on clearance; drive to three different stores because each store only has one can of stain remaining. Apply stain. Realize that on shelves stain looks nothing like it does on package. Also realize that one can of stain would have been more than enough. Lower standards. Adjust goals.

Two coats later, it still looked nothing like the package. But the saw marks are gorgeous.
Calculate that each shelf – with books – will weigh in around 150 pounds. Look for studs in wall. Use three different studfinders. Find none. Panic. (See “abject fear,” above.)
Use magnets to find what we hope are “framing nails,” and that we hope are attached to studs. Acknowledge that we’re trying to attach nearly a thousand pounds to a wall built in the early 1900s. Ignore all flashing warning signs and move forward with ill-advised floating bookshelf project anyway.

There are now three broken lag bolt shafts hidden in our wall.
Start attaching brackets using the strongest lag bolts we can buy. Snap three lag bolts off in the wall. Try to understand how this has happened. Fail to understand. Buy new lag bolts. Drill out secondary holes in brackets.
Devise unique and creative plumb line using sewing thread, a binder clip and a 9-volt battery in valiant attempt to install brackets along a straight vertical. Realize that a plumb line is totally irrelevant in an early 1900s house.
(Drill straight into a nail on one memorable occasion, despite the magnet trick.)
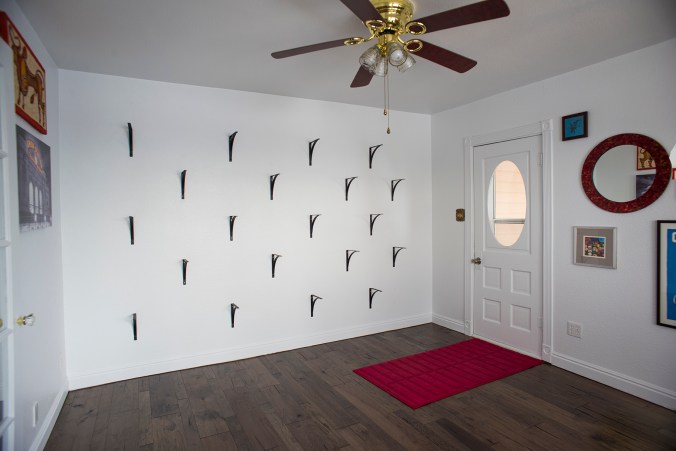
Just reaching this point was a major accomplishment.
Twenty wall brackets are finally attached! Celebrate! Only briefly, though.
Set up chop saw on front porch. Carefully measure length of each shelf from wall to wall. Acknowledge that walls are nowhere near straight, and each shelf will be a slightly different length.

Based on this post alone, we’re never getting sponsorship.
Cut each 2″ by 12′ shelf individually. Attempt to fit onto installed wall brackets. Acknowledge yet again that walls aren’t straight, and neither is the ceiling. Trim, measure, fit, trim, measure, fit. Use level. Ignore level. Try to cut acute and obtuse angles. Fail. Repeat for all five shelves. Knock shelves into walls repeatedly, leaving stain marks everywhere, and narrowly avoid breaking expensive vintage glass door panels that probably can’t be replaced.
Shelves are fitted! Celebrate! Only briefly, though.

Spray painting the side brackets so they match. Now they’re black like our mood.
Now it’s time for the side brackets. Measure and mark where side brackets should be drilled. Drill pilot holes into what should be just drywall but feels like solid brick. Make substantial holes in brick drywall. Accomplish nothing. Acknowledge that the “no drill needed” wall anchors we’ve purchased will not go in no matter what. Swear profusely. Regroup.
Find different wall anchors. Aggressively hammer new wall anchors into existing large holes. Cross fingers.
Refit shelves. Refuse to acknowledge that lumber is also heavily warped, but then pretend that a 2″ thick piece of solid wood can be unwarped by screwing tightly into side bracket. Install bracket at wrong height, thereby refusing to account for the Laws of Physics. Notice quarter-inch gap between shelf and bracket.
Burst into rage-fueled tears and storm outside. Find large pile of rotten wood and even larger stick. Smash rotten wood into tiny toothpicks while shouting and swearing. (The best part of living on a farm? No one can hear you scream.)
Return to project and apologize to partner. Shim the gap where Laws of Physics were ignored. Finally complete shelves. Take deep breath and walk away.

The final result looks even better than I’d hoped.
Friends, this was by far the toughest and most infuriating renovation project we’ve yet completed – and I’m entirely to blame. The whole thing was my idea, and I genuinely thought that it would be simple. Many painful lessons were learned, the most important of which is don’t try to thwart the Laws of Physics; learning how to work with, rather than against, the complexities of an early 1900s house is a close second. Without my partner’s unlimited reserves of patience, good humor and superhuman strength these gorgeous shelves would never have been completed, as I would have thrown my toddler-style temper tantrum and abandoned everything midway through. I’m everlastingly grateful to someone who shows me how to be a better person every single day, and I can’t wait to share these shelves once they’re finally filled with books (and hopefully still attached to the wall). Stay tuned!

The shelves look wonderful!! I was laughing through the entire blog ONLY because I used to have a home built in Golden in 1944 and there were no county building “rules” at that time. Had the same problem with almost everything I tried to do. Your home will look beautiful!!!!!
LikeLike
Thanks, Susan! Glad the humor came through…it really is funny. I think those of us who choose to buy and renovate and live in old houses have a special masochistic streak. There is a severe learning curve, for certain!
LikeLike
You might not get sponsored for bookshelf building, but you can get a book deal out of it! Hilarious write up 🙂 Turned out great!
LikeLike
Thanks, Kelly! I’m still working on my Zen breathing after the entire experience.
LikeLike
Hilarious. The simplest things, right?
They look wonderful and I cannot wait to see them filled!
LikeLike
Thanks, Maggie! It was certainly supposed to be simple. I am so looking forward to unpacking boxes of books! It’s like visiting with old and new friends.
LikeLike
Our first house had an addition, built by the owner; a carpenter he was NOT. While looking for studs on a outside, load-bearing wall, found none where they should have been. Removed the drywall, found short 2x4s nailed together, stood wherever he felt like putting them. I feel your pain!! I just wish I could have been a mouse in the wood pile, with a camera. Priceless!!
LikeLike
Jim, you can hide a lot of mistakes under drywall! We also thought it was interesting that none of our studs had consistent spacing – on this wall in particular the gaps narrow as the wall moves east. Very odd.
LikeLike
I laughed out loud reading this as I could hear your voice telling this story. My favorite step was letting the lumber ‘cure.’ They look fantastic and you should be proud.
LikeLike
Thank you, Sara! This shelving experience was a great learning opportunity. Hopefully the shelves will stay attached to the wall!
LikeLike
Pingback: Farm update: February 18 | Finding Quiet Farm