Food stamp challenge

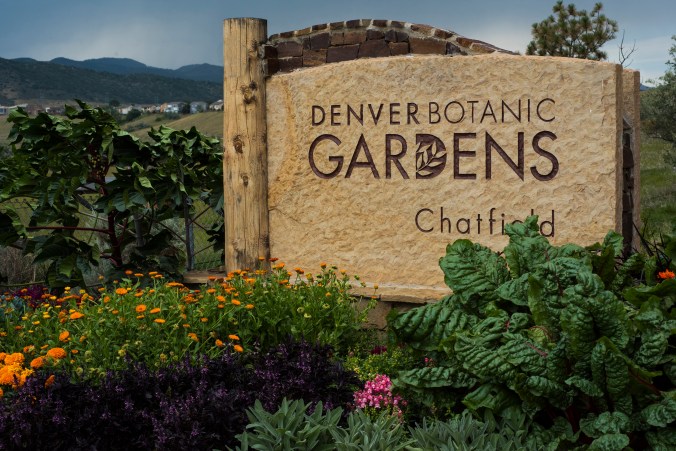
One of the comments I hear most frequently in my cooking classes and presentations is that “it’s impossible to eat healthy on a budget.” I wholeheartedly disagree with this statement, and to prove my point, I decided N and I would take part in the Food Stamp Challenge. In Colorado, the challenge is organized by Hunger Free Colorado; your state will have different resources available.

While SNAP (Supplemental Nutrition Assistance Program) benefits vary from place to place and family to family, in Colorado food stamps amount to approximately $4.20 per person, per day. That amounts to $1.40 per meal, if you eat three meals a day, or about $29.40 per week; that number encompasses everything you consume, including drinks and snacks. (Legally, you cannot buy alcohol, tobacco, lottery tickets or non-food products with food stamps, but unfortunately you can buy soda, energy drinks, candy, cakes, chips, cookies, ice cream and plenty of other unhealthy items.) This is going to take some planning, and some smart shopping.

Here’s the tricky bit, though: SNAP benefits can’t be used for any sort of takeaway food, and can’t be used for anything consumed within a store. So no prepared deli items, no to-go coffees, no rotisserie chickens. It’s easy to see why smart hunger relief experts advocate cooking classes along with SNAP benefits; to make the most of this program, you really need to know how to cook from scratch.

Since my household comprises two adults, I’ll allot us a total weekly budget of $58.80. And since I want to play in the most honest way possible, I’ll plan for the way we currently eat: we drink black coffee in the mornings but don’t eat an early-morning breakfast; we typically eat around 10AM and 4PM (it works for us). We also eat very little meat, so going mostly vegetarian won’t be much of a struggle; this budget definitely doesn’t allow for a lot of good meat. And we only eat at restaurants when we’re traveling, so planning and cooking all of our meals at home won’t stress us, either.

Food Stamp 05 sml

Scanning for sales is key to eating well on a budget.

A couple of other caveats about our food stamp challenge:

  • A challenge like this is necessarily a snapshot in time. We’re doing our challenge in December, which definitely makes most fresh fruits and vegetables harder to come by in our Rocky Mountain region – and they’re certainly not local, except for onions and greens! Fresh produce would be more abundant and less expensive in late summer.
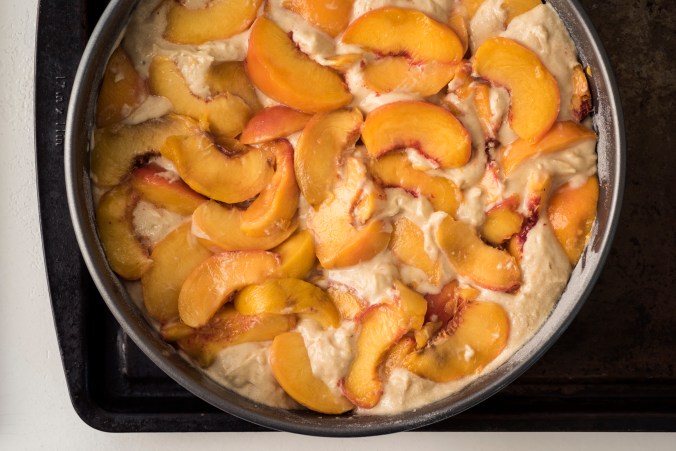
  • To play fair, I am not using our backyard honey, or my own canned and frozen goods pantry. I have dozens of jars of applesauce, salsa, Western Slope peaches and other homemade canned goods, plus lots of produce in the freezer, but since I can’t truly ascribe a dollar value to these, we’re not eating these during the challenge.
  • I refuse to dramatically change our standard eating style in order to adhere to the budget; I’m not going to add cheap meat or nutritionally devoid, high-sugar cereal to our shopping list just to have something on the table. That isn’t what we eat now, and I believe the point of this challenge is to make fresh, delicious, nutritious food on a limited budget – not to just eat for the sake of eating.
  • As mentioned above, we’re a household of two healthy adults, and we only eat two meals a day. Your own household’s food stamp challenge will look very different, but we would love to hear about it!

Food Stamp 03 sml

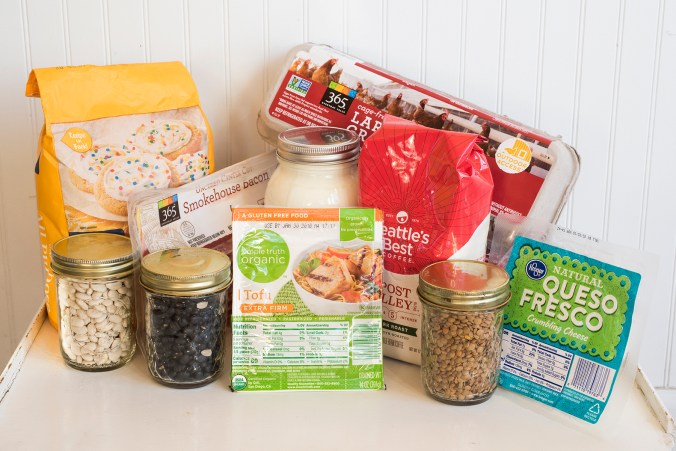
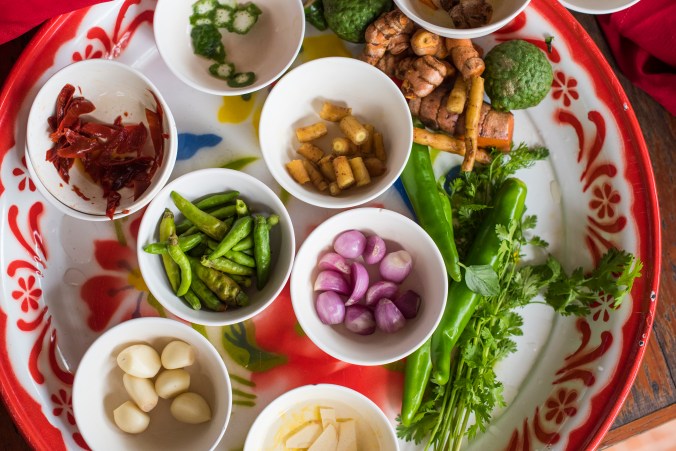
Some of our food stamp challenge ingredients. Embrace the bulk department.

Here’s what I bought for our challenge:

  • 12 oz. whole-bean coffee ($4.99, and it amounts to about $0.12 per cup. Worth every penny.)
  • 12 oz. animal-welfare certified bacon ($4.99)
  • dairy: 1 gal. local whole milk ($2.19), plain yogurt for starter ($0.59), 10 oz. queso fresco cheese ($2.49)
  • two dozen non-GMO cage-free with outdoor access eggs ($5.98)
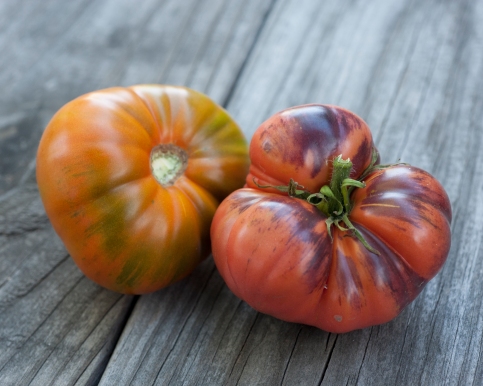
  • fruit: 3 apples ($0.98), 3 grapefruit ($0.99), 1 lb. grapes ($0.97), 6 kiwi ($0.99), 3 pomegranates ($0.99), 3 pears ($0.98), 8 satsuma clementines ($1)
  • grains and legumes: 0.5 lb. dried black beans ($0.85), 0.5 lb. brown rice ($0.35), 0.5 lb. dried chickpeas ($0.75), 0.5 lb. green lentils ($0.59), 0.5 lb. rolled oats ($0.35), 1 lb. linguine ($0.99), 0.5 lb. white beans ($0.99)
  • 1 lb. organic tofu ($1.79)
  • vegetables: 2 lb. broccoli ($1.76), 1 lb. carrots ($0.69), 1 bunch cilantro ($0.33), 12 oz. frozen corn ($1), 2 cucumbers ($1), 3 bell peppers ($0.99), 2 heads garlic ($0.66), 2 bunches kale ($1.98), 1 lb. yellow onions ($1), 12 oz. frozen peas ($1), 5 oz. salad greens ($1.69), 1 bunch scallions ($0.33), 3 zucchini ($0.99)
  • staples: assorted bulk spices ($1), 0.5 lb. roasted almonds ($2.99), corn tortillas ($0.99), 5 lb. flour ($1.79), 0.25 lb. roasted pumpkin seeds ($1.25), 3 packets yeast ($1.19 with coupon), hot sauce ($0.99)

Total spent: $58.41

Food Stamp 04 sml

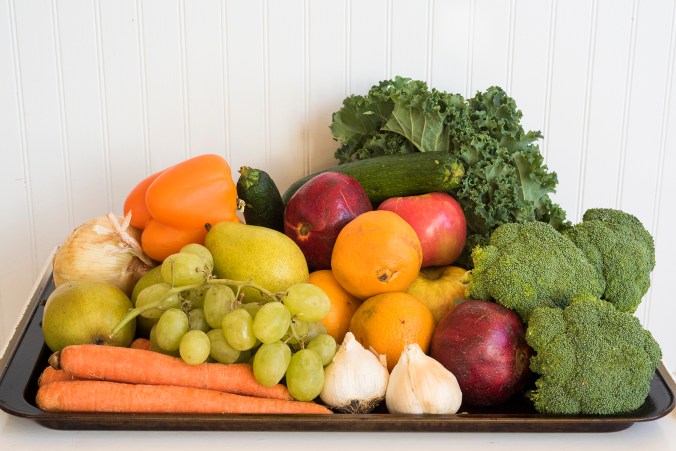
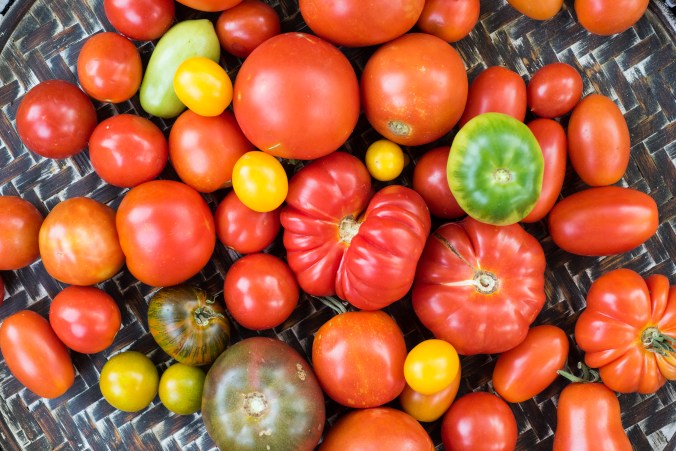
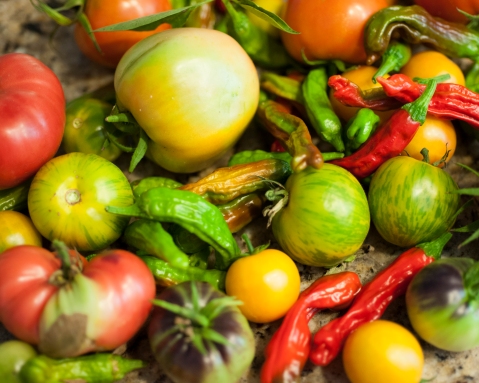
Thanks to savvy shopping and the discount table, this is less than $10 of healthy, nutrient-dense fruits and vegetables!

And here is our simple seven-day menu plan; again, we start with a pot of black coffee and only eat two meals per day. For snacks, we eat fresh fruit or raw vegetables, plus a handful of almonds and pumpkin seeds.

  • Day One: yogurt with fruit and almonds; white beans and sautéed kale with fried eggs; fresh bread
  • Day Two: breakfast tacos with eggs, zucchini, peppers, onions and queso fresco; tofu and broccoli stir-fry over brown rice; green salad
  • Day Three: oatmeal with fruit and almonds; pasta with bacon, garlic, zucchini and peppers; green salad; fresh bread
  • Day Four: eggs on toast with sautéed greens; lentil, vegetable and chickpea soup; green salad; fresh bread
  • Day Five: yogurt with fruit and almonds; frittata with vegetables, greens and queso fresco
  • Day Six: oatmeal with fruit and almonds; spicy black bean and corn soup; kale salad
  • Day Seven: huevos rancheros with leftover beans and rice; “favorites” (i.e. everything remaining from the week)

Cast Iron 05 sml

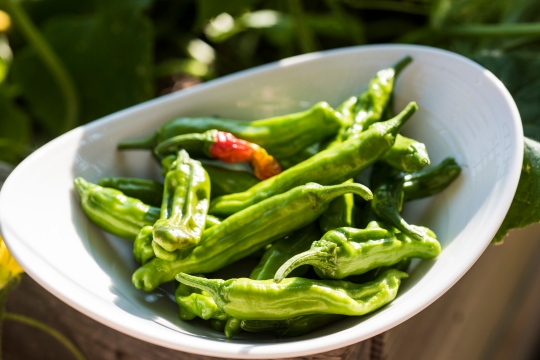
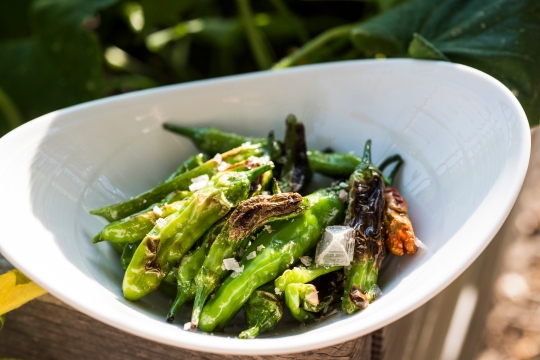
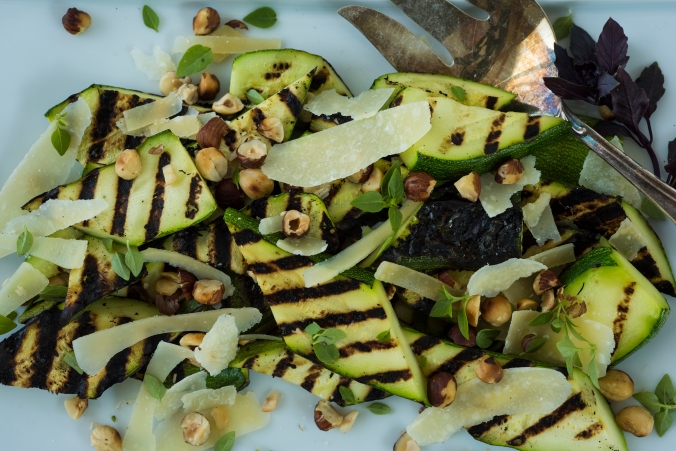
Remind me again why vegetables are boring?

My comments on the week:

  • Our menu wasn’t really that different from what we eat on a regular basis. Each day included at least four servings of various fruits and vegetables and usually more, plus grains and legumes. Virtually everything we ate was healthy, flavorful and made from scratch. We didn’t feel hungry or deprived, but I can easily see how someone accustomed to eating at restaurants and/or eating a lot of meat might find this challenge…well, challenging.
  • I chose bacon as our only meat for the week because it offers so much flavor in even tiny quantities. In addition to adding it to pasta and soups, I also used the rendered fat for sautéing vegetables and greens for extra savory punch. Skipping the bacon entirely would obviously leave about ten percent of the weekly budget for other items, but that’s a sacrifice I’m willing to make. I’d rather eat a small amount of good, flavorful meat than a lot of cheap meat.
  • I made four quarts of my own yogurt from one gallon of whole milk; the starter culture only has to be purchased once since you use a bit of your own yogurt as the starter for future batches. Plain full-fat yogurt made from good milk is a great source of quality protein, fat and calories, and dramatically cheaper than buying it premade.

Food Stamp 07 sml

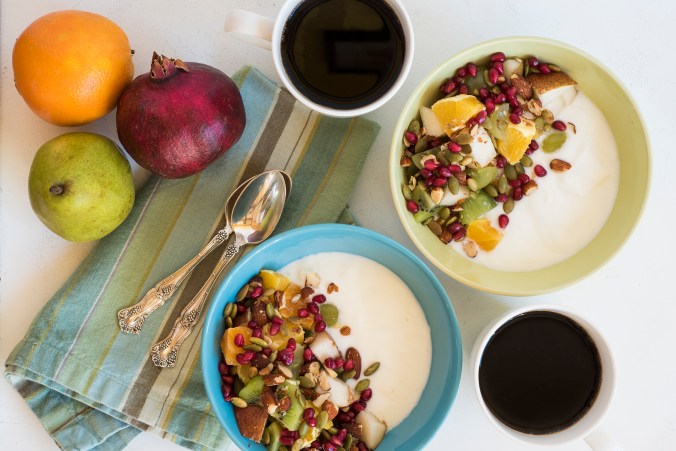
Does it still count as breakfast if we eat at eleven o’clock?

  • I also baked my own fresh bread as I do now, both for health and economic reasons. Although one could claim that whole wheat flour would be a better choice for homemade bread, I would argue that any homemade bread is far better than what you can buy, and far cheaper. Plus, stale bread becomes croutons and breadcrumbs, which add extra value and flavor; storebought sandwich bread doesn’t go stale, it just molds. (I buy my yeast in one-pound bags for $2.99 from a local restaurant-supply store; this is far cheaper than three packets for $1.19, even with a coupon. If you bake bread regularly, buy your yeast in bulk.)
  • It’s virtually impossible to eat purely organic on a budget this tight. While I appreciate the virtues of organic, with so little money to spend I’d far rather eat more conventional fruits and vegetables than just a few organic ones. Value for money wins here, although some of the discounted produce was organic.
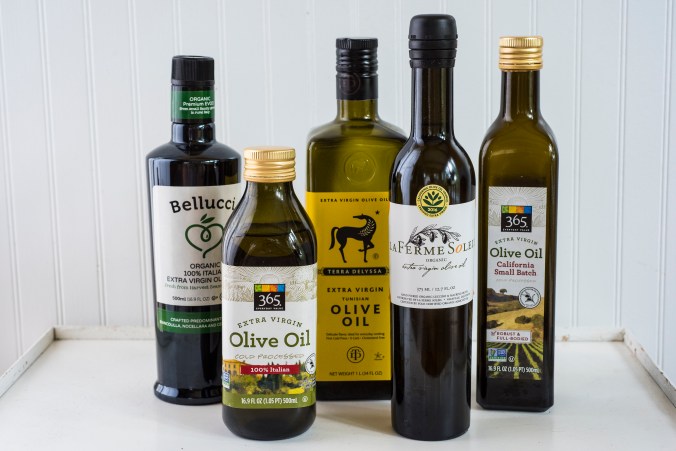
  • I did miss having access to a well-stocked pantry, specifically various oils, vinegars, cooking fats (including good butter), seasonings and condiments. It’s very easy to make delicious, healthy food by just dressing it up a bit, and citrus, spices and other flavor enhancers really come in handy.
  • I also really missed cheese. We eat a lot of cheese, both on its own and as a garnish for vegetables and grains, and while I love queso fresco, I really enjoy using a variety of specialty cheeses in almost every meal. Plus, good cheese can often be found at a discount at our grocery store, too!

Food Stamp 02 sml

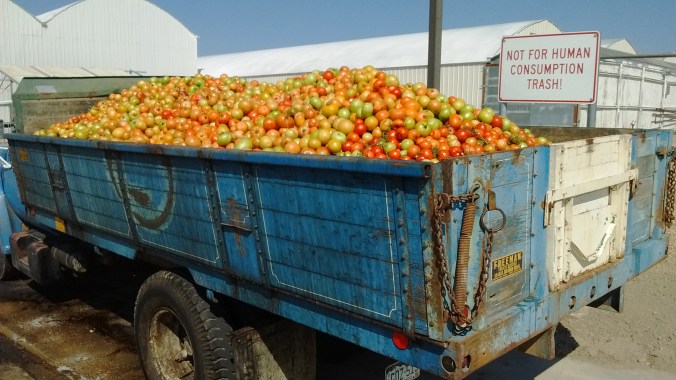
Because we’re obsessed with aesthetic perfection and meaningless sell-by dates, it’s easy to find supermarket bargains.

Tips for success for your own food stamp challenge:

  • Flexibility is absolutely key. I bought what was on sale, rather than what I necessarily wanted. If you’re going to cook well on a budget, pay attention to store advertising circulars, clip coupons and learn to adjust your meal plan based on what’s available at a good price, rather than what you feel like eating.
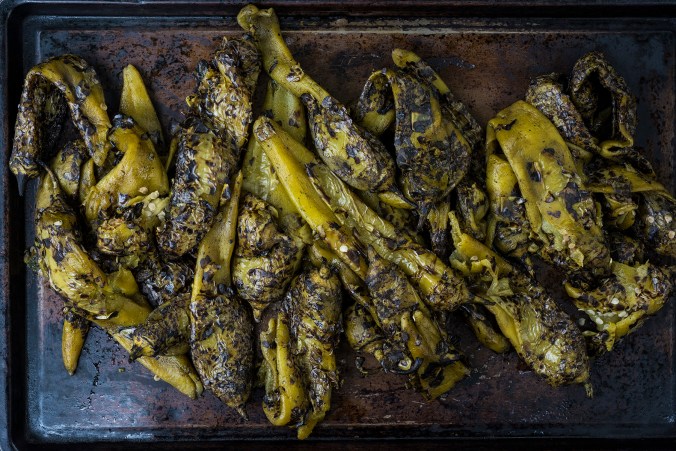
  • Our local grocery store has recently started selling blemished or undersized produce at a discount. This produce made all the difference in our food stamp challenge; most of our fruits and vegetables came from this table, usually packed at three for $0.99. I also always search for items close to their sell-by date that the store is looking to offload at a discount; I’ve purchased a lot of healthy, cheap and still-good food this way (see photo above). Don’t ignore this option if you’re cooking on a budget.
  • Also, don’t ignore frozen vegetables. They are cheap, healthy and easy to have on hand, plus they were frozen when that vegetable was actually in season. Fresh vegetables aren’t always the best option, especially on a tight budget.
  • Shop the bulk department for grains, legumes and spices; skipping the inflated packaging makes a huge difference in price. Dried beans are far less expensive than canned, and they don’t contain excess salt, either. Soaking beans overnight takes virtually no time and a slow cooker makes preparing healthy food easy.
  • Search out local ethnic markets. I could have spent substantially less on produce and beans if I had gone to any one of our incredible Mexican markets here in Denver. I wouldn’t buy animal products there, but I’d definitely buy pantry staples.

Food Stamp 01 sml

Pasta is oft-maligned, but it is quick, inexpensive, filling, and most importantly easy to pack with lots of vegetables.

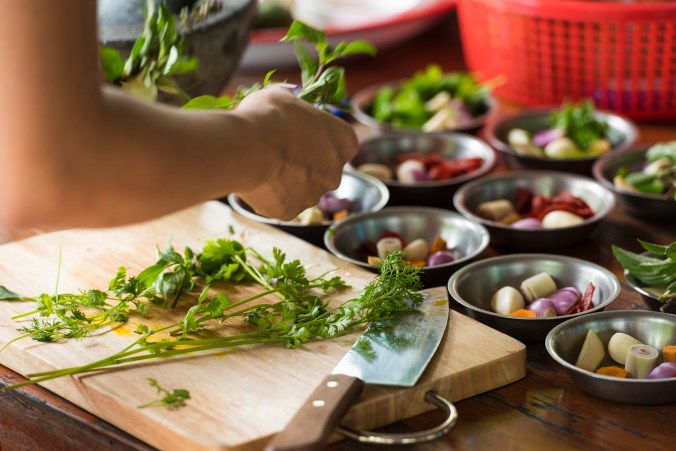
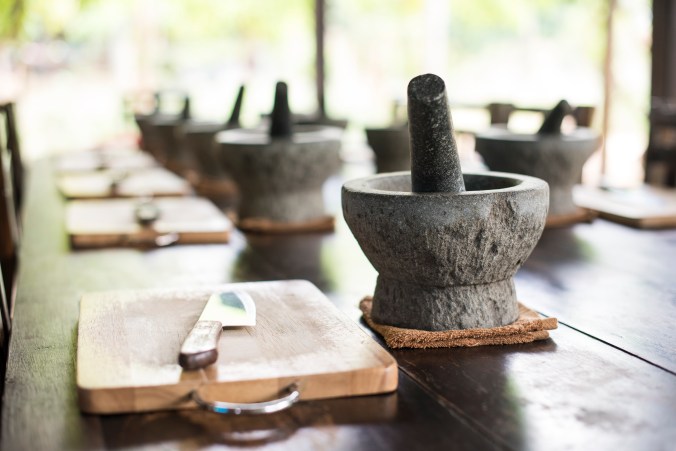
  • Get a good knife and a good cutting board and learn how to prep your own fruits and vegetables. Paying for the precut product costs a lot extra and it’s already started to deteriorate, too.
  • Think nutrient-dense and lots of color: discounted spinach, sturdy kale or purple cabbage rather than cheap but nutritionally vacant iceberg; black beans over pinto beans. Whenever possible, choose the most intensely colored whole food (that Windex-colored Gatorade does not qualify).
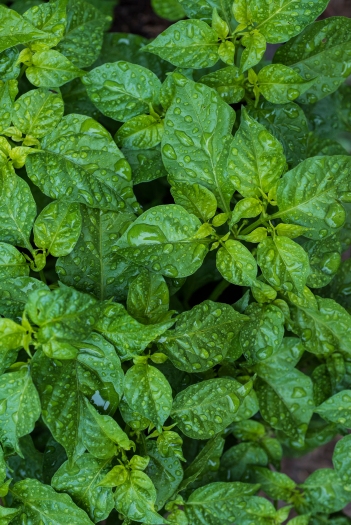
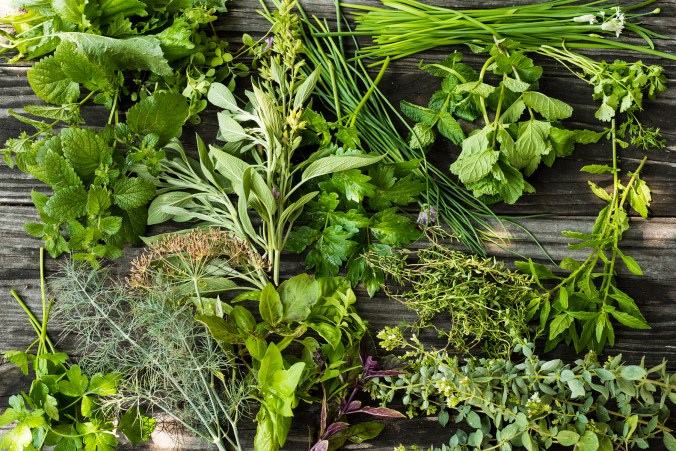
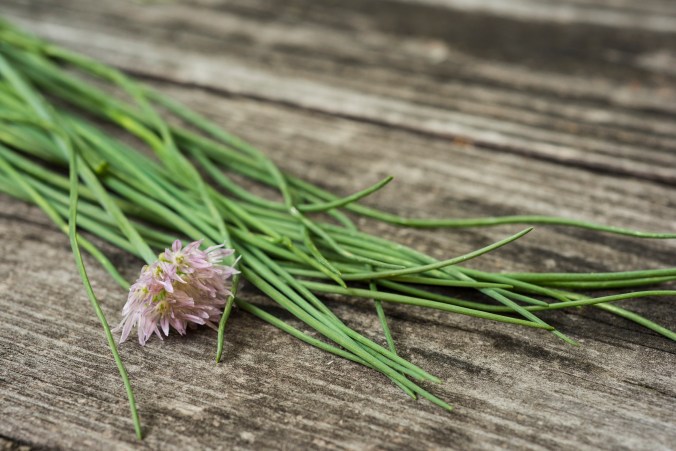
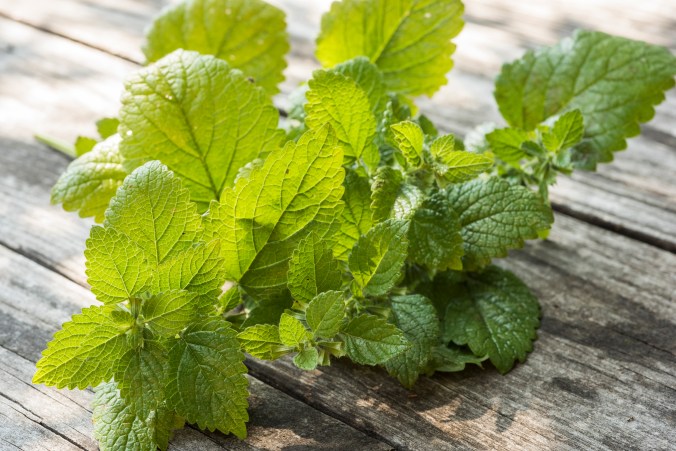
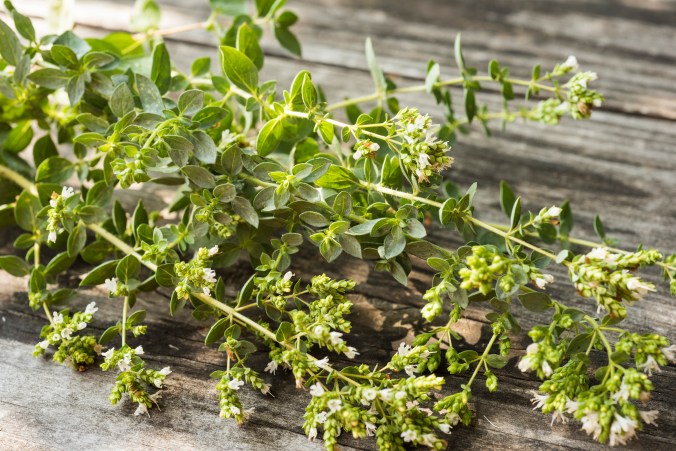
  • And think high flavor, too. I used small amounts of bacon, sharp, salty queso fresco and crunchy nuts and seeds to add a lot of flavor and texture to our dishes. You don’t need much, but they add interest. I spent money on onions, garlic, scallions and cilantro, both because they’re healthy and because they add a ton of flavor and punch without spending a fortune. Growing your own fresh herbs is a great way to enhance your meals.
  • We had quite a bit of food remaining at the end of the week (both prepared and raw ingredients); this is partially why our final day incorporated “favorites.” If you want to eat on a budget, you have to make use of leftovers, too. Throwing away food is exactly the same as throwing away money.

Food Stamp 06 sml

Garlicky white beans and kale with fried eggs: pretty much perfect, in my opinion.

N pointed out that this challenge was easy for me, because I know how to prepare healthy, delicious food and enjoy doing so. While that’s certainly true, I would say yet again that the number-one best thing you can do for both your physical and your financial health is to learn how to cook, and cook often – whether or not you’re on a strict food budget. Take responsibility for your own health, and cook yourself some wholesome, tasty food. You don’t need to break the bank to do that.

If you choose to organize your own food stamp challenge, please share it with us!


Enough

Back in the Ye Olden Days, N and I worked on boats. One of these boats – the one we met on – was a scuba diving liveaboard that plied the waters between St. Maarten and St. Kitts, in the Netherlands Antilles. Much of our history together, along with thousands of other people, was erased earlier this year with the landfall of Hurricane Irma. The island we knew so well doesn’t exist any longer.

Thanksgiving magazines

Every year, they promise the PERFECT Thanksgiving. And every year, we buy it.

On this particular dive boat, there were as many as eighteen guests and eight crew. I cooked, and N guided dives. And because provisioning in the Caribbean is never easy, the weekly menu was set by the home office, and it was the same, week in and week out. We had Taco Night, and a barbecue, and because most of our guests were American, every Thursday was a full Thanksgiving spread. Because – trust me – there is nothing you want to eat more in the middle of a humid Caribbean July than the heaviest meal known to man. Every. Single. Thursday.

Thanksgiving turkey ad

We’re so rich in this country that we will give you a free turkey!

I’ve cooked well more than fifty full Thanksgiving meals in my time on this planet thus far, and I’d like to state here and now that I am done. Unsurprisingly, N cannot stand the meal either. I’ve talked about this before in my classes – how much I really, really loathe this season – but this year, it’s worse than ever. I simply cannot embrace the excess. The waste. The sheer, utter, obscene overconsumption just for the sake of pointless tradition.

Stone Barns-11.jpg

Over two hundred million pounds of food will be thrown away on or shortly after Thanksgiving. The USDA conservatively estimates that over one-third of all turkeys raised for this one day will be thrown out, uneaten. These animals lived a horrible life and died for nothing. This is the season both for abundance and for waste, when we’re both begged to donate to hundreds of needy charities yet told at every turn that we need to buy more, eat more, consume more. I can no longer support America’s most gluttonous holiday: we’re the only country in the world that celebrates Thanksgiving, and we do so with such little regard for the shocking overconsumption that we promote to the rest of the world. And then there’s the day after Thanksgiving.

NJB_1413

Because nothing says “giving thanks” like buying a bolt-action rifle on Black Friday.

A holiday devoted to proudly eating oneself into a “turkey coma,” followed by camping out so we can buy ever-larger televisions or the latest iPhone? Or a new gun? What is there to celebrate, honestly? While this holiday may have actually originated as a rightful celebration of having enough, now it’s about having more. More of everything. More food, specifically the dishes we just “have to have at the table.” You know, Aunt Mildred’s casserole that everyone secretly hates but it’s tradition. And so it sits there, congealing, and is quietly thrown out at the end of the evening because no one, no one wants to take it home. Or the two meat main courses, because everyone really needs both ham and turkey. And everyone really needs eight different side dishes. And everyone really needs three desserts. And everyone really needs to throw all this excess food away on the Sunday evening after Thanksgiving because, quite frankly, everyone is f*ing tired of looking at it.

Turkey.jpg

How about this year, we declare it enough. We have enough. Enough food. Enough electronics. Enough guns. Enough unused things in our house collecting dust. How about this year we agree to eat less, to buy less, to not feel sick at ten o’clock at night while we’re camping out at Bed Bath & Beyond. How about this year, we don’t worry about what do with all those leftovers because we just cooked enough. How about this year, we just decide that what we have is enough. And how about we leave it at that.

Cooking Class: Chiang Mai, Thailand

We’re excited to be headed out on the road again, and in that spirit we wanted to revisit some of our favorite moments from our adventures earlier this year. Some weeks back, we shared a cooking class we had taken in Udaipur, India. And as we’re in nostalgia mode, and I’ve got Thailand on my mind since I just spent time talking to a friend about his trip, let’s return to Chiang Mai and a fabulous cooking class we experienced there. Like our Indian class, this day out was one of the highlights of our trip to southeast Asia.

Thai dessert bowl

Looks like Thai green curry, but it’s actually dessert: sweet rice pudding with bananas and coconut milk.

Thai rice market

Dozens of varieties of rice are for sale at the market.

Thai ingredients market

Fish sauce, a key ingredient in southeast Asian cooking.

We started our cooking class at one of the many local markets, where we sampled various ingredients and drank cold, sweet Thai iced coffee. While the cooking school has an extensive garden and grows many of their own herbs and spices, they still need to shop for a few things. Many Thai homes don’t have refrigeration, so shopping each day for fresh ingredients is both a pleasure and a necessity.

Thai cooking tables

We’ll grind our curry pastes and chop our ingredients here.

We left the market and traveled by minibus to the school, where we were offered iced jasmine tea and given a tour of the property. The cooking school is perfectly set up to accommodate guests, with spaces for prep, cooking and eating together.

Thai garden chilies

Tiny, fiery Thai bird chiles. Typically, the smaller the chile, the bigger the punch.

Thai ingredients basket

Fresh herbs and aromatics, just harvested.

The cooking school has acres of gardens, where they grow lemongrass, basil, coriander, mint, galangal, ginger, kaffir lime, chiles and many other ingredients for their classes.

Thai cooking kitchen

Our indoor-outdoor kitchen, with cooking stations set up for each student.

Thai ingredients board

Thai ingredients bowls 01

Thai ingredients bowls 02

All of the components for the recipes we would make in class were neatly laid out for us. I emphasize this classical French technique a lot in my own cooking classes: it’s called mise-en-place, and it literally means “to put everything in its place.” When you’re cooking, assemble all of your ingredients like this in advance; it may seem tedious and time-consuming, but it actually makes preparing your dish much, much easier. Trust me.

Thai cutting board spoon

Fresh herbs and tamarind paste, like fish sauce, are key to classic Thai cooking.

Thai pestle mortar table

Although you can of course make curry paste in a blender, traditionally it’s prepared in a stone mortar and pestle.

Thai pestle mortar

Grinding aromatics for red curry paste.

Thai wok stir-fry veg

A wok allows for quick, high heat, so vegetables and proteins remain crisp and fresh.

Thai wok stir-fry tofu

Pad thai, a favorite Thai dish. In Thailand it’s not quite as sweet as it often is in America.

Thai red curry

Vegetarian red curry soup. Good Thai food is most often a delicate balance of hot, sour, salty and sweet.

Craving some Thai food after reading this? Me too. Try here, here or here. And if you have the chance, definitely book a cooking class on your next adventure. It’s well worth the time and money to cook and eat like a local, if only for a few hours.

Backyard chickens

We have made no secret here at Finding Quiet Farm of our love for backyard poultry. Honestly, what is there not to love?

Black Star

A Black Star from our most recent flock.

They monitor the rodent population. They keep weeds under control. They are ridiculously entertaining. And most importantly, they turn food waste into incredible eggs.

Pullet Silver Wyandot 01

Our young Silver Wyandotte pullet at about six months.

Pullet Barred Rock 02

Lovely, but these chickens are NOT supposed to be in these raised beds.

Okay, sometimes they (repeatedly) escape the run you’ve so carefully built and they eat your tomatoes. But the eggs are worth it, we swear.

chickens4

A Barred Rock (upper left) and a Silver Wyandotte.

chickens2

A strong, proud Australorp, one of our favorite breeds.

We’ve had two flocks now at our suburban home, and we encourage the entire universe to keep backyard chickens. They’re less work than dogs or cats, with more reward. They need food, clean water and shelter, of course, plus the ability to run around and eat bugs and weeds and kitchen scraps and what-have-you, and they need protection from predators. Where we live, those are unfortunately rampant – hawks, owls, raccoons, foxes, dogs – but thanks to N’s superlative coop-building skills, we never had a single bird taken.

chickens1

The windfall apple clean-up crew.

If you’re thinking of adding chickens to your family homestead, check your local regulations first. We’re allowed five hens and no roosters where we live, but laws vary widely from city to city. Know what you’re buying, too; many a rooster has ended up abandoned at a shelter because it was sold as a hen. It’s not common knowledge, but you don’t need a rooster to get eggs – and they’re illegal in most communities.

Garden Snow 02

Winter is coming. Seriously. And the chickens need to stay warm.

If you live in a particularly cold area, make sure to buy cold-hardy breeds and that your coop protects your birds from winter drafts. It’s actually easier for birds to stay warm than cool (those trusty feathers) but icy winds can be very detrimental to their health. When planning your coop and run, keep in mind that chickens also need adequate shade in hot summer months. Keeping their space clean and dry doesn’t take much time or effort, and you’ll be amply rewarded.

chickens3

Chickens are not vegetarians, no matter what your egg carton says.

Oh, the “vegetarian-fed hens” you see advertised on your egg cartons? They’re only vegetarian because they’re crowded into miniscule cages and don’t have the opportunity to eat what they actually want to eat, which is mice. And bugs. And lettuce. And sandwich crusts. And overly ripe peaches. And leftover sausage bits. And the aforementioned tomatoes. Chickens are omnivores, not vegetarians. Please remember that the next time you buy eggs, and don’t be swayed by meaningless packaging terms – or by bucolic pictures of peaceful, verdant farms. In the U.S., at least, laying hens have by far the worst lives of any production animal.

Chicken eggs

Small pleasures: collecting still-warm eggs from nest boxes.

None of the other labels on your egg carton mean anything either, by the way. Whether “farm-fresh” or “natural” or “pasture-raised,” not one of these is regulated by any governing body. You can pretty much slap whatever you want on an egg carton and call it good, and people will pay more for pretty words that make them feel better. “USDA Organic” is actually regulated – if they can find enough inspectors to do some real inspecting – but it only indicates that the chickens consumed organic feed, not that they had any sort of decent life. Well over 95% of all commercially produced eggs in the U.S. were laid by hens who lived their entire lives in less space than a standard piece of paper. They never went outside, they never hunted or pecked, they never dust-bathed,  they never saw sunlight or grass, they never even flapped their wings because they didn’t have enough room. That’s why eggs are cheap, and also why salmonella outbreaks are rampant. Bottom line: buy your eggs from someone you know.

Eggs Thai pink

Eggs for sale at a Thai market.

Americans are often shocked when eggs in Europe and elsewhere in the world aren’t sold in the refrigerated section. Yet another example of our obsession with “safety” and “hygiene,” in this country we wash all eggs prior to shipping and sale at grocery stores, superstores and warehouses. This removes the protective coating that eggs are laid with, and reduces their shelf life, thereby requiring refrigeration. Eggs in the rest of the world aren’t washed until they’re used, and so can be stored at room temperature.

Eggs Basket

Although brown eggs will cost you more at the grocery store, there is no nutritional difference. The color of the shells is determined by the chicken’s breed, not by what it eats or where it lives. Most supermarket eggs are white because they were laid by Leghorns, the most common breed in the U.S., whereas brown supermarket eggs were probably produced by Rhode Island Reds. Blue and green eggs come from Araucanas and other unique breeds. You’re not getting any extra nutrition by paying for brown eggs.

Eggs Comparison

There really is a difference between eggs laid by battery hens and those laid by true free-range birds. Notice the backyard egg, on the right: the white is thicker, with more color and viscosity, and the yolk is definitely more yellow. This indicates a varied diet, including foraged protein.

Eggs Frying Pan

And when they’re cooked, the backyard egg (again on the right) stays true and tall, but the battery egg sort of melts. Supermarket egg yolks are weirdly chalky and sticky when cooked, while backyard eggs have a buttery creaminess. The taste difference, honestly, is night and day. Good eggs taste the way eggs ought to taste, instead of some insipid manufactured version thereof.

Eggs

According to legend, the one hundred pleats in a chef’s hat represent the number of ways they know how to cook eggs.

Whether or not you keep chickens at home, know that eggs from well-kept hens are one of the best inexpensive protein sources available. Ask at your local feed store or farmers’ market to find eggs raised near you and support backyard poultry, or start your own flock! Go here to learn more.


Food waste + helpful tips!

Thankfully, we’re finally, finally talking about food waste in the U.S. Chefs have long been painfully aware of the staggering quantities of perfectly edible food thrown out in restaurants and hotels on a daily basis, but only recently have we started discussing how much food is wasted in grocery stores and, more personally, at home.

Waste tomatoes

Trash tomatoes at a greenhouse operation in eastern Colorado.

I want people to cook at home, obviously, and I also want people to save money. I teach classes on how to reduce food waste, and I typically cite statistics like “40% of all edible food produced in the United States is thrown away uneaten” and “The average American family throws away over $2,000 worth of food every year.” I like to augment these cheery facts with even more cheery facts, like that the annual value of all edible food thrown away worldwide is over $3 trillion. That, however, isn’t even a comprehensible number, nor is the idea that food waste takes up more space in landfills than any other item – including the devil of them all, disposable diapers. Decomposing food contributes more methane to the environment than all livestock together; if food waste were a country, it would be the third-largest polluter in the world, after the U.S. and China.

Waste strawberries

All destined for the trash and no, they won’t be composted.

Let’s be realistic: I can drone on and on, citing all sorts of numbing statistics, but it makes for boring reading and quite frankly, no one really wants to read a blog where they’re lectured for their appallingly bad habits. Plus, eco-anxiety is an actual thing, and many of us, myself included, feel utterly powerless about our ability to do anything in the face of insurmountable problems like climate change. But minimizing your own food waste is something you can actually do to both save money and save the planet, rather than just wring your hands helplessly. So let’s keep it a bit more positive and I’ll just present a professional chef’s tips for minimizing food waste at home!

Zuccini

We grew these! Unfortunately, only one would be saleable at a standard grocery store. Our aesthetic expectations are utterly unrealistic.

But wait! Before we get into the helpful tips, let’s boost our positivity even further by highlighting organizations actually doing something about food waste!

Cucumbers

We grew these too! Same story as the zucchini above; only one is the correct size.

Americans throw away food for lots of different reasons – mostly because food here is cheaper than anywhere else in the world, and we’re really picky – but at home there are two key factors: meaningless expiration dates and poor planning. A bit of effort on your part will not only save you lots of money, but also keep food out of landfills. It’s a true win-win! (Fun fact: sell-by dates were introduced in Marks & Spencer storerooms in the 1950s; they first appeared on consumer-facing shelves in U.S. and Europe in the early 1970s.)

Waste Honey Jars

Honey doesn’t spoil. Ever. It’s been found in edible condition in Egyptian tombs. So why the expiration date?

At the Store:

  • Shop with a list and buy only what you need. Before going to the store, check out the coupons and promotions. Make a meal plan for the week and incorporate ingredients on sale, and review the contents of your pantry, refrigerator and freezer. How will you know what you need if you don’t know what you have?
  • Avoid “bulk club” buys unless you’ll actually use it. Warehouse-style shopping – i.e. ten pounds of spinach or quinoa – might seem like a bargain at the time, but if you let it spoil it just means money wasted. It seems counterintuitive, but there are times when spending more for a smaller amount is the better choice. Be honest with yourself about how much your household will actually eat.
  • Use the bulk department for spices, grains, beans and more. In addition to reducing packaging, you can buy exactly the amount you need and try lots of new ingredients too!
  • If you only need a tiny amount of an ingredient, consider the prepped food available in the store’s salad bar. This might avoid buying an entire package that you’ll then throw away, plus you’ll save on prep time.
  • If you only need half a cabbage or a tiny portion of cheese, just ask nicely. Most stores will be happy to provide exactly what you need instead of what they’ve already packaged.
  • If you’re going to buy a special, expensive ingredient for one recipe, figure out other recipes in which you can also use that ingredient rather than wasting it.
  • If you shop at your local farmers’ market and you’re planning on doing any canning or preserving, buy seconds. These are just as delicious as the first-run produce, but you get to pay less and your farmer doesn’t have to throw their hard work away.

Waste Salt

It’s a rock. I’m fairly certain we will expire long before it does.

At Home:

  • Most importantly, remember that all best-by dates are only a guideline. Please, use your common sense when deciding whether to throw something away simply because an unregulated date on the package says to. These dates are totally confusing, essentially meaningless and they contribute hugely to our food waste issue.
  • Shop from your own pantry and challenge yourself not to buy food for a week, two weeks or a month. Use up everything you have before buying more.
  • Learn to repurpose your food: when you make your weekly meal plan, also consider the meals you’ll make from the leftovers. Batches of whole grains or rice can be used for numerous meals.
  • Store your produce properly. Certain items should stay on the counter (tomatoes!) and others should go in the fridge (apples!). Know how best to keep everything fresh.
  • Use your freezer – if you’re not going to use something, freeze it. Bread freezes beautifully, as do most vegetables, meat and fruit. Use small containers and wrap items well; label and date everything.
  • Portion control is important. Start with a small amount on your plate, and get seconds if you want them rather than taking a huge serving and throwing most away. This goes for serving kids, too.
  • Devote one dinner per week to “favorites,” and eat leftovers rather than throwing them out.
  • Start a compost bin and be amazed by how much less trash your household produces; the compost you make will do wonders for your vegetable garden. Even better: get a flock of backyard chickens and enjoy fresh eggs while they enjoy your fruit and vegetable scraps.

Waste compost

Our compost pile looks a mess, but it turns into the most incredible soil.

What can you make with random odds and ends?

  • It mystifies me that people regularly throw away bread and buy croutons. If you’ve got stale bread, you’ve got croutons, crostini and bread crumbs. Tear or cut bread into chunks, toss it in a little olive oil, salt, pepper and garlic powder and toast in a 300 degree oven until golden and crispy. Slice slender baguettes into thin slices for crostini and toast as for croutons. Store in an airtight bag. Process in a food processor or blender to make bread crumbs; store crumbs in the freezer.
  • Just about any listless vegetable can become part of a delicious soup. Dice vegetables into small pieces, simmer in stock, and finish with a drizzle of good olive oil and a sprinkling of sharp cheese.
  • Tomato sauce can take a lot of extra vegetables without you even noticing! Add in not-so-perfect carrots, celery, greens, onions, squash…and puree the whole thing. The tomatoes will dominate, trust me.
  • And all those vegetable trimmings from your soups and sauces? Add onion tops, celery leaves, carrot peelings and other odds and ends to a zip-top bag and store in the freezer. When it’s full, simmer to make homemade vegetable stock. Add chicken or beef bones too, if you’ve got them.
  • Parmigiano rinds are every Italian grandmother’s secret to the most flavorful soups, stocks, broths and risottos. Store in the freezer and use as needed for extra umami punch.
  • Fruit no longer nice enough to eat fresh? Cut it into small pieces and freeze it on a cookie sheet. Once frozen, transfer the chunks to a zip-top bag and use for smoothies.
  • Speaking of smoothies, all your greens – kale, spinach, chard – can be thrown right in with your fruit and yogurt. You might notice the color, but you won’t notice the taste.

Above all else, consider the amount of time, effort and money that went into the food you’re eating – and respect that by treating it carefully and mindfully!

Cookbook Club: Full Moon Suppers

It will come as precisely no surprise to any of you that I have what some might consider an excessive cookbook collection. I try to keep it pared down – honestly, I do – but then every October the local library has their annual book sale where you get to fill shopping bags for $6 each and I just lose any ability I might once have had to act like a rational adult. It’s true. And no one will ever, ever help us move.

Peach Cake Cook Book.jpg

Not long ago, this cookbook crossed my path, and it is pure and simple and lovely. As a professional chef, I know that most cookbooks are used by home cooks, and therefore I am infuriated (not too strong a word) by gorgeous, glossy, overproduced cookbooks with fabulous photos where the recipes don’t actually work. Home cooks, especially those just starting out, don’t need perfect photos of airbrushed superstars (or blog stars) happily munching on avocado toast. What they need are clear, easy to-understand recipes that have been tested many times, in many kitchens (preferably home kitchens), with variable equipment. And possibly not all of the correct ingredients.

Peaches Garden.jpg

The last of the season’s stone fruit. 

Annemarie Ahearn has been cooking and farming on her family’s property overlooking Penobscot Bay, Maine, since 2009. As she says,

“I had not moved to Maine on a whim. My plan was to open a cooking school for home cooks and teach people how to grow a kitchen garden. The mission of the school aligned with my personal ambition, which was to fundamentally change my daily routine. City life, while rich with professional opportunity, did not feed my soul in the way that I was hoping a more rural life would. And what better place to experience nature than on a farm, nestled between the mountains and the sea? So many skills that my grandmothers and generations prior to theirs possessed I did not know the first thing about. Chopping wood for warmth, putting up preserves for winter, catching a fish for dinner and raising laying hens for eggs were all efforts that I wanted to experience firsthand.”

The book is broken into twelve menus, appropriately themed to the twelve months of the year. Her recipes are simple, seasonal and easy to follow, and every single one pays homage to the land above all else. I can’t get the quality of Maine lobster that she has, nor fresh periwinkles, but there are plenty of recipes here that could easily be made across the country, depending on the season. We haven’t been to Salt Water Farm (yet), but we feel a definite kinship between the cooking and farming life Annemarie has forged for herself on Maine’s rocky, windswept coast and the cooking and farming life we want to build at Quiet Farm, wherever that may be.

Tomatoes Green.jpg

Please ripen before first frost hits…

I’ll be completely honest and say that I’m a little late on this post, but truly that’s only because I was (im)patiently waiting for our tomatoes to ripen so I could make a glorious summer salad. Salt Water Farm has a short growing season too; they treasure their warm-weather peaches, tomatoes and corn just as we do at nearly six thousand feet in the Rocky Mountains. You work with what you have.

Lovage G&T.jpg

Cocktail hour is my favorite hour!

Each of the twelve menus in Full Moon Suppers starts with a paired beverage. N and I really only partake of gin-and-tonics in summer; they seem to suit the weather so well. I’ve seen a couple of recipes this summer encouraging the use of lovage in a simple syrup to add to G&Ts or sparkling water; since I have an abundance of lovage that I leave for the bees every year, I thought I might as well use it. The syrup is truly simple: combine two cups water, two cups sugar and bring to a boil. Add eight cups roughly chopped lovage, remove from heat and allow to cool completely while lovage steeps. Strain into a clean quart jar and store in refrigerator. It’s herby, grassy and deeply refreshing, whether in a cocktail or sparkling water. I’m surprised by how much I like it.

Tomatoes Tray 02.jpg

Tomato Cucumber Salad.jpg

I know that I said previously that once you finally have ripe tomatoes, you should only anoint them with olive oil and salt. But really, you should also find some amazing local sweet corn (I froze all my excess from this event) and some fresh cucumbers and you should make this salad. It has a simple vinaigrette made with lemon and mustard and honey and red wine vinegar, and honestly, it tastes like summer in a bowl. This is not a salad you’d make any other time of the year – only when the ingredients are at their absolute very best. And that window of opportunity is very swiftly closing.

Peach Cake Recipe.jpg

Peaches Tray.jpg

And then there’s the peach cake, although in my world it’s a peach and nectarine cake, plus I added almonds to complement the almond flour and for extra crunch. Oh, and I just served it with mascarpone rather than sweetened whipped cream. (It’s exceedingly difficult for me to follow recipes exactly.) But this one is worth the time and effort, and even though it takes forever to bake, you’ll be rewarded. The butter creates a gorgeous, rich crust, but the interior is as soft as a dream. And this would work beautifully with home-canned peaches, too, should you be so inclined, so you can make it more than two months of the year.

Peach Cake Uncooked.jpg

Peach Cake Cooked.jpg

Peach Cake.jpg

Peach Almond Cake with Mascarpone

Chef’s Notes: As mentioned above, I included 1/2 cup slivered almonds in the batter; incorporate these with the dry ingredients in the first step. I used a combination of ripe peaches and nectarines, and I served the cake with just a dollop of this plus additional sliced fresh peaches and nectarines on the side. No additional alterations are needed to bake this cake in the Denver area, although above 7,000 feet you may wish to make adjustments. This cake counts as breakfast, in case you’re wondering.

For The Cake

  • 1 cup all-purpose flour
  • ½ cup almond flour
  • ½ tsp. sea salt
  • 2 tsp. baking powder
  • 9 tbsp. unsalted butter, softened to room temperature
  • 1 heaping cup sugar
  • 3 extra-large eggs, at room temperature
  • 1 tsp. vanilla extract
  • ¾ cup cream
  • 4 large, pitted peaches, thinly sliced
  • 2 tbsp. melted butter

For The Cream

  • 2 cups heavy cream
  • 1 tbsp. sugar
  • ½ tsp. vanilla extract
  • ½ cup mascarpone
  • confectioner’s sugar for dusting
  

Directions

Preheat the oven to 375°. Line the bottom of an 8-inch springform pan with a round of parchment paper. Butter and flour the sides of the pan.

In a medium bowl, combine the all-purpose flour, almond flour, salt and baking powder. With a stand mixer fitted with the paddle attachment, whip together the butter and sugar. Incorporate the eggs one at a time, whipping well. Whip in the vanilla extract. Mix in a third of the dry ingredients, then a third of the cream. Continue alternating the dry ingredients and cream in thirds, scraping the sides of the bowl in between additions.

Pour the batter into the prepared cake pan. Spread the peach slices on top and press them into the dough. Brush with melted butter. Bake for 1 hour, or until the cake has set and turned golden on top. The cake is done when you insert a toothpick into the center and it comes out clean. Allow to cool on a rack; serve slightly warm or at room temperature.

Using your stand mixer fitted with a whisk, whip the cream with the sugar and vanilla extract until soft peaks form. Fold in mascarpone.

Serve slices of cake on individual plates with a generous spoonful of cream and a dusting of confectioner’s sugar on top.

(All recipes reprinted with permission from Full Moon Suppers at Salt Water Farm by Annemarie Ahearn and published by Roost Books, but the photographs are N’s!)

Cooking from the garden

Friends, hello. It is early September and thus the height of the harvest season in our corner of the world. And though the tomatoes are finally, finally coming on after an unseasonably cool August, I find that I’m struggling to work up the enthusiasm I typically have during this time of abundance.

Veg Mixed

Right now seems to be a time of sadness for just about everyone. Not only are people suffering in our country and of course across the world, but closer to home friends and family are coping with grief, misfortune, illness, despair and all sorts of darkness. I struggle mightily (and often unsuccessfully) not to carry the weight of the world, so at times like these I always find myself back in the kitchen. We soldier on, doing our best; no matter what, we all need to eat.

Pepper Leaves.jpg

A habanero pepper plant after a rainstorm.

One of my biggest challenges in my cooking classes is providing clear, usable recipes, because more often than not, I don’t cook from them. I know well that everyone wants recipes – especially if you’re just starting out in the kitchen, recipes offer valuable handholding and a sense of regimented calm and comfort, a plan to follow. What I ultimately try to teach, however, is the confidence to cook without recipes – to improvise, to adjust, to have faith in the process and your own palate and that the end result might not be exactly what you planned but will still, most likely, be delicious. And summer and early fall are certainly one of the easiest times to cook without recipes, since you can let the produce guide you.

Peppers Raw.jpg

The before and after: shishitos raw…

Peppers Cooked.jpg

…and shishitos cooked, with flaky sea salt (of course).

As for improvisational cooking from the garden: let’s talk shishitos, just for a moment. These small peppers burst onto the culinary scene some years back as an appetizer in Japanese restaurants. The tip of the pepper is thought to resemble the head of a lion, shishi in Japanese; as such, their full name is shishitogarashi but is typically shortened to shishito. They’ll eventually turn red, like most peppers if left to ripen long enough, but they’re usually harvested green, about the size of a pinky finger. No recipe needed for these: crank up the heat on a cast-iron pan, drizzle with a tiny bit of neutral oil, like canola, and toss the peppers in just until they char and soften. Serve with soy sauce and flaky salt. I leave mine pretty crunchy, but you can cook them until they collapse, too, if that’s your preference.

Cucumber On Vine.jpg

Cucumbers are another summer favorite; like tomatoes, the difference between harvesting your own and buying sad, bitter supermarket versions is night and day. These little ones are theoretically designed for pickling, but to be honest I end up eating most of them raw. Thinly sliced or cut into chunks, with slivers of red onion; they’re dressed lightly with rice vinegar, olive oil, salt and pepper. Plus, any variety of bright, fresh herbs that I might feel compelled to use. Simple, fresh, crunchy, tangy and satisfying.

Zuccini.jpg

Unlike some, I am never tired of zucchini. Growing vegetables in our high-plains desert can be so challenging that I’m gratified by anything that produces so much for so little effort. Plus, zucchini is infinitely versatile, and it never goes to waste in my kitchen. Looking for an interesting spread for toast? Try this recipe from a talented Oregon farmer and home cook.

Zucchini Grilled Plate.jpg

This summer, most of my zucchini starred in this Ottolenghi classic: lightly grilled with olive oil, then layered with fresh basil, toasted hazelnuts and slivers of Parmigiano, drizzled with hazelnut oil and white balsamic. I pretty much just gave you the recipe, but if you want more specific guidance, go here.

Tomatoes Heirloom

And these beauties? Nothing more than sliced, on a plate, with a drizzle of good olive oil and a sprinkling of salt. That’s it. Growing tomatoes in Colorado – and actually having them survive until harvest – is such a labor of love that it’s a crime to do anything more.

Take care of yourselves, friends, and make something delicious and nourishing to eat. Good food matters.


The Farm Series: Chatfield Farms

A couple of weeks ago, N and I spent some time at Denver Botanic Gardens’ Chatfield Farms, so we decided to make this the second post in our Farm Series. We’ve mentioned before that since we plan to buy a farm, we visit farms whenever possible. And we’re not fussy – we’ll visit any kind of farm, whether or not it’s similar to our vision for Quiet Farm, because we believe we can learn something from every single one.

Sweetcorn Chatfield 01

Chatfield Farms occupies 700 acres along the banks of Deer Creek. It’s a historical site, a native plant restoration area, and a working farm with a 270-family CSA program, plus it includes nature trails and spectacular birdwatching. I’ve been part of the Veterans-to-Farmers program here and taught cooking classes at DBG for years now, and N photographed a friend’s wedding at Chatfield a couple of years ago, but we hadn’t yet had the chance to spend an evening at Chatfield Farms. And what an evening it was.

Sweetcorn Chatfield 02.jpg

We were at the farm to participate in DBG’s annual Colorado Foodways event, which showcases both local food and local farmers. We showed up early with a car loaded down with grilled sweet corn and chiles from Palizzi Farm in Brighton, plus applewood-smoked goat cheese from Haystack Mountain, and we set about making samples for 150 guests.

Sweetcorn Chatfield 04

But see that dramatic Colorado sky? Oh yes, there was rain. And wind. And more rain, and more wind. And a tent that flipped itself over and very nearly took down all of my carefully prepared food with it. But we persevered, and we ended up having a wonderfully perfect summer night in Colorado. And in times like these, it’s always essential to remember that we may believe we’re fully in control, but nature often has other ideas entirely.

Sweetcorn Chatfield 03

Blue skies after all!

Sweetcorn Whole

What says summer more than fresh, local sweet corn?

Sweetcorn Mixed Grilled

The sugars in sweet corn start turning to starch as soon as it’s picked. Leave the husks on until the very last minute, and eat it as soon as possible!

Sweetcorn Husks

Husking one hundred and twenty ears does leave quite a lot for compost.

Peppers Roasted

Charred green chiles…the scent of late summer and early fall in Colorado.

Sweetcorn Plated

Colorado Charred Sweet Corn and Green Chile Salad


Ingredients

  • 8 ears fresh Palizzi Farm corn
  • Olive oil, as needed
  • 4 large Palizzi Farm green chiles
  • 1 large red bell pepper
  • 1 pint cherry tomatoes
  • 1 bunch cilantro, trimmed and chopped
  • 1 bunch scallions, trimmed and chopped
  • 1 jalapeno or other hot pepper, minced (optional)
  • Juice and zest from 3-4 limes
  • 1-2 tbsp. white wine vinegar
  • 1 tsp. chile powder
  • Kosher salt and freshly ground pepper, to taste
  • 4 oz. fresh Haystack Mountain goat cheese, crumbled
  

Directions

Preheat a grill or broiler to medium-high heat. Remove the corn husks and rub the ears gently with a paper towel to remove the silks.

Rub six ears of corn lightly with olive oil and place on grill. Cook, turning as needed, until corn kernels are lightly charred. Remove corn from grill and set aside to cool. When corn is cool enough to handle, place one end upright on a cutting board and use a sharp knife to remove kernels. Cut kernels off two remaining raw ears of corn and combine with grilled corn.

Roast the chiles and bell pepper until skins are blackened; place in a glass bowl or container and cover tightly to allow steam to loosen skins. When cool enough to handle, remove skins, stems and seeds; roughly chop chiles and pepper.

Halve the tomatoes, and combine in a large bowl with cilantro and scallions. Add chiles, peppers, raw and grilled corn and hot pepper, if using.

In a small jar, shake together juice, zest, vinegar, chile powder and a pinch of salt and pepper. Pour dressing over salad, and taste for seasoning, adjusting as necessary with additional lime juice, vinegar, salt and pepper. Serve at room temperature, garnished with crumbled goat cheese.

Fresh herbs

It’s August in Colorado and that means the garden is finally, finally overflowing. We’ve had more than a few cool, rainy days recently; that leaves everything looking (falsely) lush and green, although it certainly doesn’t help the tomatoes ripen. This is when cooking is the easiest it will be all year: just go outside and harvest.

Herb Assortment

Especially in summer, when they’re cheap and abundant, fresh herbs are by far my favorite way to elevate simple home cooking. I get rather resentful about buying expensive plastic clamshells of herbs well past their prime for nine months of the year, but in the summer I can add them to everything with abandon.

If you want to grow herbs at home, the most important thing to know is your zone: in the U.S., we classify the entire country into growing zones based on climate. Most herbs will grow well on a sunny patio or deck; some may be perennials, which means they’ll come back year after year, while others might be annuals, so they’ll only last for one season. Find a good local garden center or a proficient gardener friend to serve as a resource.

Basil.jpg

Genovese, Thai purple and Greek ‘Yevani’ basil.

Basil is one of summer’s most versatile herbs; it shines with tomatoes and in pesto, of course, but is also underutilized with summer stone fruits and in cocktails. Make pesto in large batches and freeze in ice cube trays; once the cubes are frozen, empty into plastic zip-top bags and use with pastas and soups throughout the winter.

Chives.jpg

Chives and chive flower.

Thank goodness for chives; they’re a perennial in the Denver area and typically the first sight of green after a bleak winter. I use chives almost more than any other herb; they offer bright, fresh onion flavor without being too aggressive. Perfect for eggs; use the flowers as a garnish on salads.

Cilantro.jpg

Love-it-or-hate it cilantro.

Cilantro appears most often in Mexican and Asian cuisines. It’s a bit tricky to grow in Denver, as it tends to bolt quickly in our intense heat, but it’s worth trying in a cool, shady container. The aversion to cilantro that makes it taste like soap to some people is thought to be genetic.

Dill.jpg

Dill, gone to seed.

Growing up, dill was always labeled “dill weed.” This is accurate in other parts of the country, but it doesn’t tend to overrun Colorado gardens. Annoyingly, my dill is always ready long before my pickling cucumbers. Delicate dill is a perfect partner for fish, potatoes and pickles of any variety.

Epazote.jpg

Epazote, popular in Mexican cooking.

A friend started epazote for my herb cooking class earlier this year (thanks, Jim!), so this is the first season I’ve had it. It’s most commonly used when cooking dried beans, as it moderates the “negative effects”. Use sparingly; a little goes a long way.

Garlic Chives.jpg

Garlic chives, recognizable by their flat rather than tubular appearance.

As with chives, garlic chives are a frequent guest in my kitchen. Ideal with eggs and perfect as a last-minute garnish over just about anything. They have a light garlicky bite but aren’t too strong.

Lemon Balm.jpg

Lemon balm is often considered an invasive weed.

Years ago, when we first moved in to our house, I planted lemon balm. I wasn’t much of a gardener then and had no idea how aggressive it can be; it’s a member of the mint family, however, so really I should have known better. Now we have lemon balm everywhere, but the bees love it and it’s rare to find plants that grow well in Denver’s harsh climate, so I leave it alone. Perfect for making teas and tinctures.

Lovage.jpg

Lovage leaves.

Lovage is another bee-friendly plant that I mostly leave alone, but this year I made lovage simple syrup for flavoring sparkling water and elevating gin and tonics. It has a pungent, celery-like flavor and can be used as a garnish for soups and stews, but as with other strongly flavored herbs, a little goes a long way.

Marjoram.jpg

Delicate, underused marjoram.

Marjoram is criminally underused in American cooking; it can go pretty much anywhere oregano might. It’s perfect in meat mixtures, such as meatballs or sausages, and adds lovely flavor to sauces, too. Any stuffed vegetable topped with tomato sauce is a great place to show off marjoram. Easy to grow in pots, but not a perennial in Denver.

Oregano.jpg

Oregano in flower.

Oregano pairs beautifully with tomatoes, especially in slow-simmered sauces. I also use it in herbed breads, typically mixed with thyme and sage. It’s a perennial where we live, so my plants come back every year. It’s one of the easiest herbs to dry for winter storage. Mexican and Greek oregano are the two most common varieties for home gardens.

Parsley.jpg

Flat-leaf parsley.

For so long, parsley has been relegated to a wilted garnish (with a sad orange slice, of course) on the side of the plate at cheap breakfast joints everywhere. With the interest in Mediterranean cooking, however, parsley is coming into its own. It’s an excellent source of vitamins C and K, and its bright, snappy flavor livens up just about anything. I use it in grain salads (like tabbouleh) for crunch and texture, and also add the leaves to salad greens. I prefer flat-leaf to curly, but both should be used more than they are.

Sage

Velvety sage leaves.

Sage is most often used with poultry, specifically Thanksgiving turkey. As with oregano, I use it frequently in herbed breads as well as sausages. It’s also a perennial and a bee favorite, plus the leaves dry really well and don’t lose too much flavor. And the plant grows into huge bushes here, which is rare in this climate.

Shiso.jpg

Soft, floppy shiso, a Japanese favorite.

Shiso is a recent discovery for me, and I’m really learning to love it. It is common in Japanese cuisine, along with many other herbs unfamiliar to American palates. The flavor is difficult to describe, but it’s herbaceous, with a little mintiness. It’s perfect thinly julienned in citrus or green salads, and it has a real affinity for fish. It’s also lovely in Vietnamese summer rolls, which typically contain an array of bright, fresh herbs. Surprisingly easy to grow (mine are in pots) once the seeds have started successfully.

Spearmint.jpg

Kentucky spearmint, one of the many members of the mint family.

There are hundreds of varieties of culinary mints; I prefer Kentucky spearmint. It grows well (some might say too well) and is useful in classic mint juleps, mojitos, fruit salads and every kind of summer vegetables. I add a little mint to salad greens, blend it into chocolate shakes and throw it on most grain salads. Again, an herb that I think everyone has but no one uses enough.

Thyme.jpg

English thyme, delicate and pretty.

Thyme has a soft flavor and pairs wonderfully with stone fruits like peaches and plums. It goes with summer vegetables, like eggplant and tomatoes, and is one of my culinary workhorses for focaccia and other breads. Great in desserts, too. To remove the tiny leaves, place one end of the stem through a hole in a sieve and pull gently. The leaves should remain inside the sieve, saving you a lot of time and trouble!

The FAQ Series: Oils + Fats

We kicked off our new FAQ Series with a post on salt; for our second installment, we’ll discuss cooking oils and fats. One of the most common questions I hear in my classes is “What sort of oil (or fat) should I cook with?” The short answer: it depends.

Olive Oil 02.jpg

As per usual, raiding my pantry yielded a surprising number of oils.

The most important things to know about any specific cooking oil or fat, beyond its potential health benefits, are its flavor profile and its smoke point. Certain oils, like sesame and unrefined coconut, will have a pronounced flavor and may not be applicable in all situations. A fat’s smoke point is the temperature at which it starts to break down; this can be a bit vague as it happens over a range of degrees rather than at a precise moment. When the fat starts to break down, it indicates a loss of flavor and nutrients, and possibly an imminent fire.

Olive Oil Splash.jpg

Taste your olive oil straight…but maybe not out of a martini glass.

Oils are crushed, pressed or centrifuged out of nuts, seeds and fruits. Refined oils may have been subjected to additional filtration, bleaching, heat, chemicals and other treatments; they’re typically usable at higher temperatures than unrefined. They also generally have a neutral flavor and a longer shelf life. With true unrefined, or raw, oils, there is very little or no heat used to produce the oil. This is where the term cold-press comes in; the highest-quality olive oils are made without any heat which might compromise the delicate flavor nuances of the oil.

Flambe

Please don’t try this at home.

All oils can catch fire when heat is applied, so it’s important to know what temperatures you’ll be cooking at. An oil’s flash point refers to the temperature at which it could conceivably catch fire. Don’t ever leave cooking oils or fats unattended while heating; if for any reason oil does catch fire, turn the heat source off immediately and cover the pan with a metal lid to remove the oxygen source. Don’t ever use water on a grease fire, and don’t try to move the pot, as you could burn yourself or others. Baking soda or flour can also be used to douse the flames, but you’ll need a lot. In other words, prevention is a much better and safer option.

Olive Oil 01.jpg

Definitely the most-used oil in my kitchen.

Thanks to the Mediterranean diet, olive oil has gotten a lot of attention recently. It’s certainly versatile, and without question the oil I use most in my kitchen. But like so many other food items, it can be confusing; most of our olive oil comes from other countries, and the FDA doesn’t regulate imported olive oils. As with honey, there have been many, many instances of adulterated olive oils sold in the U.S.; a 2010 study indicated that close to 70% of imported olive oil was incorrectly labeled. Some states, like California, have passed stringent labeling laws, but be aware that it’s pretty easy to slap just about anything on a bottle of oil and not get called out for it.

Coconut Oil.jpg

So trendy that even Crisco got in on it.

Never cook with fancy, expensive olive oils; these oils are best for drizzling over salads or vegetables, or dipping with bread. There is no point in spending $30 a bottle (or more) for an oil that you’re going to subject to high heat; you’re just wasting your money. Always smell your oils; like any fat, oils can turn rancid. Keep them in a cool, dark, dry place, out of direct sunlight, and buy in small amounts. Expensive, delicate oils, like nut oils, are often sold in opaque containers rather than glass so they aren’t subject to as much degradation. Still, many consumers actually prefer rancid olive oil; this is probably attributable to the low-quality olive oil we grew up on – we think it’s supposed to taste like that.

Sunflower.jpg

Both pretty and useful!

As with most foods, what matters most is your own palate. Before you spend hundreds on fancy olive oils, buy a few small bottles and taste the oil straight. Even better, go to a store that sells different oils and also offers a tasting bar. Some will taste sharp, or grassy, or bitter, depending on age and harvest and other factors. Don’t be swayed by celebrity chef brand names or pretty labels; price isn’t necessarily your best guide here. Figure out what you like, then buy it.

Butter 01

Thank the sweet Lord we’re allowed to love butter again.

When it comes to butter, quality definitely matters. In America, butter must be at least 80% butterfat to be labeled as butter; in Europe, it’s 82%. We’re starting to see more butterfat quantities on labels here (note Vermont Creamery products in photo above at 86%) and it does provide richer mouthfeel and certainly more flakiness in pastries. I use unsalted butter exclusively in baking and cooking so I can control the final salt content, but for spreading on good bread nothing compares to fresh, cultured, salted butter. Want to make your own? Try this recipe.

Butter 04

This little piggy became lard…

Remember when your grandmother kept the old metal coffee can filled with bacon drippings next to the stove? Like butter, lard, tallow and drippings are back in fashion; we can probably thank Team Paleo for that. It’s real fat, rather than fake fat, and it’s delicious. Use sparingly but with great enjoyment, and just like any animal product, buy from a reputable source. How the animals were raised matters.

Hazelnut Walnut Oil

Nut oils are delicious, expensive and prone to rancidity; use judiciously.

A simple (and by no means definitive) guide to cooking fats and oils:

Butter: literally nothing compares for flavor, plus exemplary flakiness in baked goods, but it has a low smoke point and burns easily. Use when the flavor will shine: in simple eggs, on top of pancakes or waffles, in pie crusts and pastries. Or make brown butter into an elegant sauce for fish or pasta. Try compound butters with herbs, garlic or other add-ins; it’s easy to make your own or buy from these lovely folks.

Canola oil: useful in baking when a neutral oil is desired; also good for sautéing and frying. This oil is a tricky one: it comes from the rapeseed plant and was developed using traditional plant breeding methods before the advent of GMOs. It was renamed for the sensitive U.S. market; the word canola is a hodgepodge of “Canada” and “oil,” since most of our rapeseed comes from Canada. There exists a misconception that all canola is GMO; although that isn’t true, rapeseed is one of the most common GMO crops, so if you’re avoiding GMOs, watch your labels.

Coconut oil: currently very trendy along with everything else coconut. Solid at cool room temperature so it behaves like shortening or butter in baking and is therefore very popular with vegans. Previously a nutritional villain, and now a hero (see also: butter, eggs, coffee, salt, red wine…)

Ghee: butter that has been clarified to remove the milk solids so that its smoke point is higher. Common in Indian cuisine.

Grapeseed oil: a byproduct of the winemaking industry, it’s neutral in flavor and best for baking, sautéing, and salad dressings when you don’t want a pronounced olive flavor.

Lard: rendered hog fat; it is neutral in flavor (unlike bacon drippings, which are smoky and bacon-y) and produces amazing pie crusts, especially when combined with butter. Obviously not suitable for vegetarians. Moderately high smoke point.

Margarine or other “fake butters”: never. Not even ever. Totally lab-created; typically hydrogenated oils often with mysterious additives. Stay away; there is literally nothing of value in these products. No, they absolutely do not reduce your cholesterol. I don’t care what the package says.

Olive oil: the most versatile and a favorite of Mediterranean diet proponents. Use olive oil for moderately high temperature sautéing, tossing with cooked pasta and drizzling over roasted vegetables. Expensive, flavorful olive oils should be reserved for salad dressings and as an accompaniment to good bread and should never be heated.

Nut oil, such as hazelnut or walnut: expensive, flavorful and great for salad dressings, especially when the same toasted nut is used in the dish. Try this simple beauty from the great Ottolenghi!

Peanut oil: high smoke point and good for frying; popular in Asian cuisine. Pronounced flavor and possible allergen issues. Great for deep-frying.

Sesame: see peanut oil, above, except that it’s way too expensive and strongly flavored for deep-frying. Dark sesame oil will have a stronger flavor.

Safflower oil: related to sunflowers, this is a neutral oil fine for frying and baking.

Sunflower oil: high in Vitamin E plus a high smoke point; neutral flavor. Use for baking and frying.

Vegetable shortening: Crisco introduced vegetable shortening in 1911 as a lard alternative. It’s solid at cool room temperature and therefore behaves similarly to butter or lard in baked goods. It’s also partially hydrogenated and not an ideal choice for health, although now the label claims “zero trans fats.” I’ll confess that it works beautifully in pie crusts and it is a vegan option.

Vegetable oil: most products labeled “vegetable oil” are typically soy, yet another primarily GMO crop. Soybean oil is one of the most common ingredients in heavily processed foods and has virtually no benefits whatsoever. If you’re looking for a neutral baking oil, choose non-GMO canola.

What should we discuss next? Let us know!