How to eat healthier

I may not love Thanksgiving, but I do love everything about January. I love the quiet after the holidays, the fresh start, the clean slate. And of course, this is the time of year when so many of us promise to do better. When we promise to eat right, drink less, stop going out to restaurants so often, quit smoking, save our money, exercise more and all the rest.Snowy trees.jpgI don’t subscribe to the negativity often associated with New Year’s resolutions. (By mid-January, over a quarter of all New Year’s resolutions have been discarded, and only a scant 10% are actually followed through to the end of the year. Those are some pretty bleak statistics.) Changing habits is hard enough; I’d much rather start off on a positive note. I make a list of goals, not resolutions.

And with that positivity in mind, how about a quick primer on eating better in 2018? This isn’t designed to be an exhaustive list, nor a restrictive diet plan, merely a few simple tips to get your head in the right place for making healthy changes in your daily eating. Diets don’t work, but changing your mindset does.

Continue reading

How to make yogurt

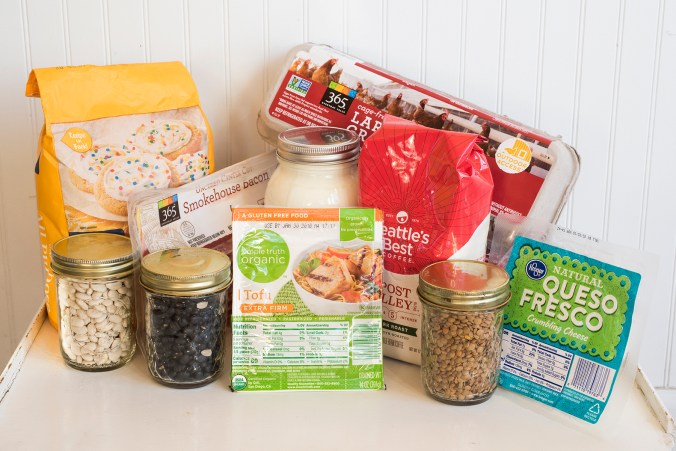
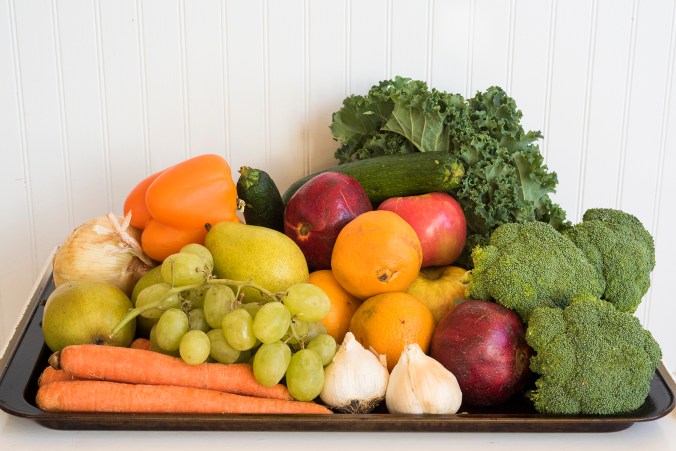
There are foods and drinks we should buy, and foods and drinks we should make at home. I would place things like tofu, amazing soft-ripened cheeses, bacon and hoppy IPAs in the first category; though I can make these things, other people are doing a much better job at it. The second category, however, would include granola, bread, salsa, applesauce, hummus and yogurt, among many others – all of these are much better-tasting, healthier and certainly cheaper made at home.

I’ve been asked a number of times recently for instructions on how to make yogurt, and since I make it once a week on average, I thought it might be high time to share this magic with the world. Making yogurt is not difficult or expensive, but it does require a bit of patience and a basic understanding of fermentation – which is typically referred to as “culturing” when used in context with dairy products. Keep in mind that the instructions below are for cow’s milk yogurt; other milks, such as sheep or goat, or non-dairy products, like almond, soy or hemp, don’t turn into yogurt the same way.

Yoghurt 01 sml

Yes, that is the current temperature in our sunroom.

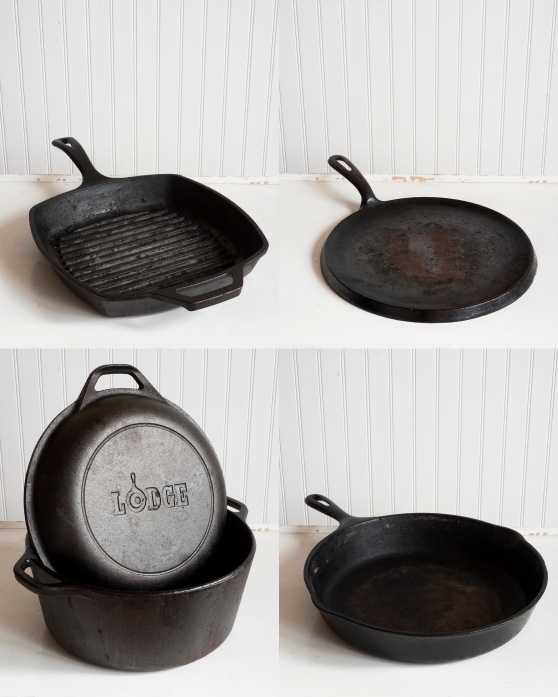
Let’s be clear on what you absolutely do not need to make yogurt: you do not need a fancy yogurt maker, or an Instapot, or specially-purchased mail-order yogurt cultures. You can use these things if you have them, but to me they all fall firmly into the category of “convincing people they can’t cook without expensive gadgets and hard-to-find ingredients.” Peasants have been making yogurt for literally thousands of years; I’m pretty sure they didn’t stop at Bed Bath & Beyond to grab a yogurt maker on their way back from the fields. What you do need: fresh milk, starter yogurt culture, a heavy pot, an accurate thermometer, a ladle, a wooden spoon, clean jars and lids, and a warm, safe place to keep your yogurt while it’s culturing.

Yoghurt 03 sml

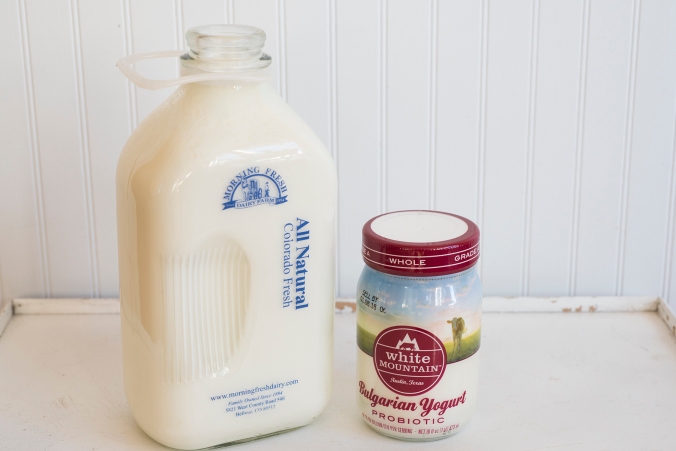
Fresh milk + starter culture = homemade yogurt!

I make my yogurt in one-gallon batches, which yields four quarts plus a bit. If your household doesn’t eat much yogurt, or if you want to start small, make a half-gallon batch. You can always scale up when you realize how much yogurt you’re eating. Don’t buy UHT or other long-life milk to make yogurt or other cultured dairy products; its protein structure has been irreparably changed by the heating process used to make it shelf-stable. And when you’re buying a starter yogurt culture, buy plain, full-fat yogurt; no fruit or other sweeteners, thickeners like carrageenan or pectin, stabilizers or other mysterious ingredients (please, no M&Ms, sprinkles or chocolate chips). Yes, you can use skim or low-fat milk to make yogurt, but why would you? I am an advocate for full-fat dairy at all times; cows don’t give skim milk, so I see no point in consuming it.

Yoghurt 04 sml

Placing your pot of hot milk in an ice bath will cool it to 110 degrees quickly.

To start, place two tablespoons (for a half-gallon) or four tablespoons (for a full gallon) of starter yogurt into a medium bowl and set aside. Pour the milk into the heavy pot. If your thermometer clips onto the side of the pan, attach it now; ensure the tip doesn’t touch the bottom of the pan or you’ll get an inaccurate reading. Heat the milk gently, stirring occasionally to prevent scorching; you’ll want to bring it up to about 175 degrees F (this could take as long as thirty minutes for a full gallon). Once it’s reached 175, remove it from heat and place it into an ice bath to rapidly bring its temperature down to about 115 degrees F. You can let it cool as is, but icing it is much quicker; stirring it frequently will bring the temperature down, too. (For those of you at altitude, please note that you do not need to adjust these temperatures.)

While you’re waiting for the milk to cool, bring a kettle of water to a boil, and place your clean jars on a folded kitchen towel on your worktop. Fill each jar with boiling water; always wash and warm one more pint jar than you think you need. Place the lids in a separate heatproof bowl and cover those with boiling water, too.

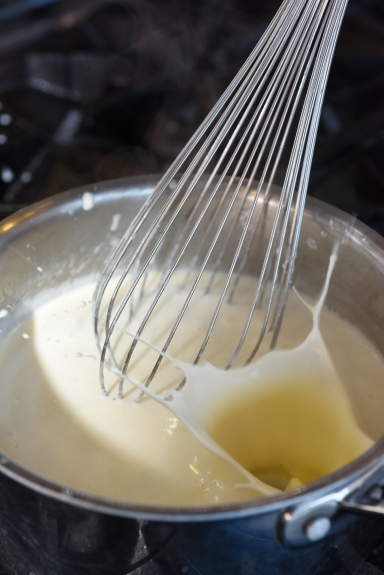
When the milk is around 110 degrees, whisk about one-half cup into the bowl you set aside with your starter culture. This tempers the culture, bringing the two liquids to a similar temperature and ensuring that the starter culture doesn’t cook when it’s added to the warm milk. Now, add the thinned and warmed starter culture to the pot of milk, and stir well. Pour the boiling water out of your first jar, and set it back on the towel. Ladle the warm milk and starter mixture into this clean, hot jar (a funnel comes in handy here). Repeat the process for the remaining jars until you’ve used all of the milk. Put the lids on the jars and close gently; the lids just need to be snug enough to keep from falling off but they shouldn’t be lumberjack tight. Wipe the jars and lids with a clean, damp towel to remove any milk residue.

You can now place the jars into a cozy spot, like a cooler lined with towels, or your (turned off) oven or microwave. The idea is to keep the jars pretty warm, which allows the culture to activate and thicken the milk. I use my dehydrator on a low setting; some people use a slow cooker or even surround the jars with heating pads or hot water bottles. You may need to experiment to figure out what works best in your household; just remember that you’re trying to keep the yogurt reasonably warm and undisturbed. Yogurt cultures love an ambient temperature range of 95 to 115 degrees; the cooler it is, the longer it will take to get a set (but it will still work!).

Yoghurt 05 sml

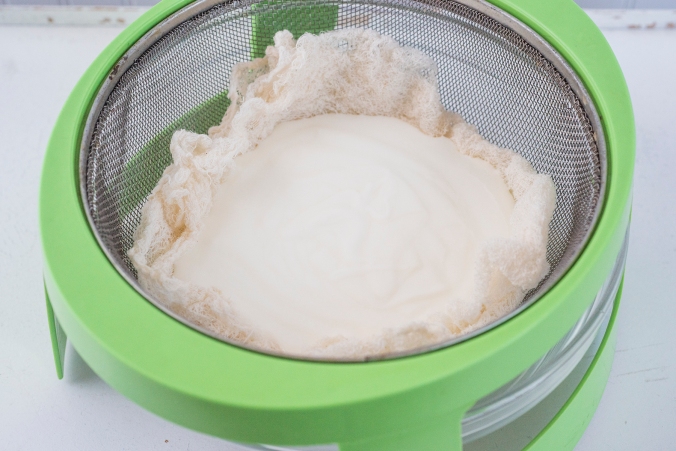
Draining the yogurt in triple-layered cheesecloth will create a thick “Greek-style” yogurt.

I typically leave my yogurt to culture overnight, depending on how much I’m making and the ambient temperature in my house. It will thicken more once it’s been refrigerated, and you can also drain the whey out, leaving you with thick, “Greek-style” yogurt. Drained whey can be added to bread doughs or smoothies, or used as a starter culture for lacto-fermented vegetables, if you’re so inclined. I almost never drain my yogurt, preferring instead to let it culture longer so I have a thicker product and can use every bit of it; when I do have leftover whey I use it to cook grains, like farro and wheatberries. I always leave my yogurt plain so I can use it in both sweet and savory applications; if you want to add in jam or vanilla or honey or maple syrup or any other sweetener or flavoring, do so on an individual basis and not to an entire batch.

Of all the hundreds of batches of yogurt I’ve made, I’ve never had a batch not set. That said, if your yogurt isn’t turning out, I’d recommend first calibrating your thermometer so you know that you’re adding culture at 110 degrees. Too hot and it will die, too cold and it will go dormant. Just like using yeast in bread baking, temperature matters a lot. If you’re confident your thermometer is accurate, I’d next change the brand of milk you’re using, and then I’d change the starter culture, again thoroughly examining that ingredient label to verify that there is nothing in the yogurt besides milk and active cultures. Storebought yogurt has a lot of junk in it; read all your food labels carefully.

Yoghurt 06 sml

Use the drained whey to bake bread, cook grains or ferment vegetables.

The temperature and speed that your yogurt cultures at determines the thickness of the final product, so once you’ve got the basic technique down, feel free to experiment with how long you let it set, and at what temperature. I’ve read that heating the milk to 195 degrees F allows for an even thicker yogurt because it denatures the proteins further, but I haven’t tried it. Know also that eventually your starter culture will wear out; if you’re making a lot of yogurt, you might find that you need to purchase a fresh starter yogurt every few months to keep your set strong.

Yoghurt 02 sml

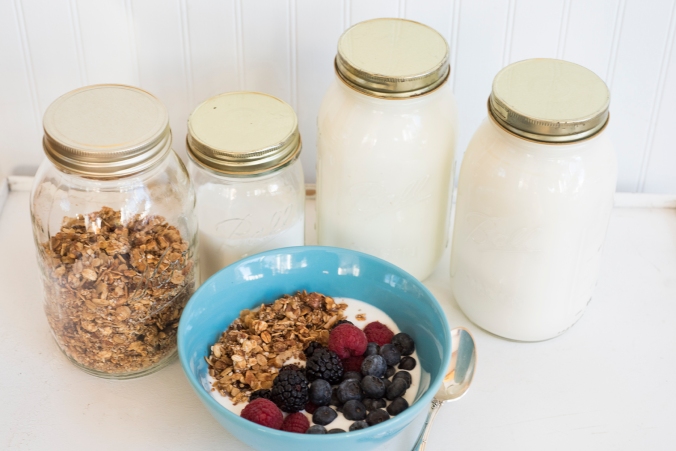
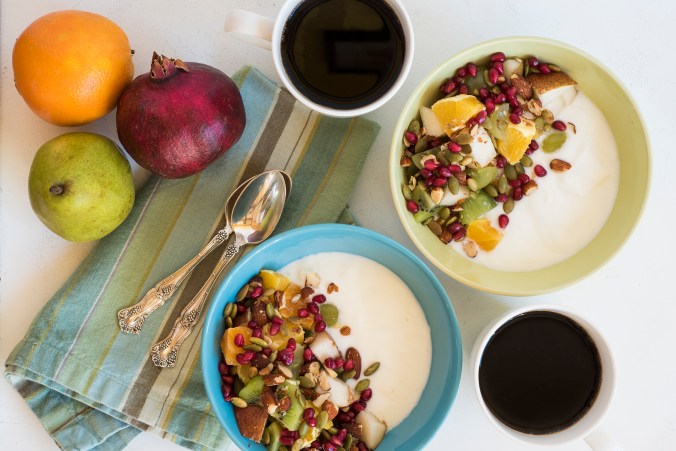
Homemade yogurt, homemade granola and fresh berries. Nom nom nom.

What else should you do with your homemade yogurt, besides enjoy it with fruit and granola? Bake with it. Blend it into smoothies. Use it to marinate meats. Freeze it in popsicle molds with swirls of jam and honey to make your own frozen treats. Add in fresh herbs and salt and make it into a tangy salad dressing or dip for fresh vegetables. Just remember to save a couple of tablespoons to start your next batch!

Cooking in cast iron

In my holiday-themed classes, I talk about how I’d rather have two or three really stellar, delicious dishes at a meal than an extensive buffet of mediocrity. I feel the same way about cookware and knives: that is, I’d rather have a few sturdy, durable pieces that perform perfectly and can take a beating, rather than dozens of cheap, flimsy pans or knives that bend, warp, break or just plain fail. Cooking well isn’t only about starting with the best ingredients, but having the tools (and the skills) to turn those ingredients into something remarkable.

Cast Iron 01 sml

See how well-loved they are? I use mine every single day.

I love classic cast iron cookware. I love its heft, its lived-in appearance, its ability to retain heat. I love that it can be passed down through generations, and it only gets better. I love that it’s not shiny, not new, not a throwaway item. I love that it looks like something I should be using over a rickety camp stove to make a fry-up for hungry cowboys out on a cattle drive. I love that there is something of quality still manufactured in the United States. I love that cast iron asks you to cook well and simply and honestly.

Cast Iron 04 sml

You can roast peppers to smoky, tender perfection!

Cast iron cookware has been in use around the world for over two thousand years, and there’s a reason for that: nothing retains heat better while still holding its form. Before we became such a disposable society, cookware like this was valued for its durability and its effectiveness, especially when slow simmering tough cuts of meat. Cast iron goes from stove to oven, and it can be used to make anything: flavorful stews, crispy yet tender cornbread, smoky, filling beans. And nothing – I mean nothing – sears a steak like cast iron. Ask any cowboy.

Cast Iron 02 sml

You can create the most amazing garlic confit!

In the first half of the 20th century, cast iron cookware was ubiquitous in America. Then – coincidentally, right about the time we started turning to processed “convenience” foods – cast iron fell out of favor. It was too heavy. Too unwieldy. Impractical for TV dinners. Not suitable for microwaving soup. Couldn’t be put in the dishwasher. And so, most of the American companies went out of business. Today, Lodge is the only major manufacturer in the U.S., although a couple of smaller, “artisan” brands like Finex have appeared recently.

Cast Iron 06 sml

You can make one-pan meals!

I got rid of my grandmother’s cast iron pans at a garage sale years ago. Freshly minted from an uppity French culinary school, I thought cast iron was too down home, too low-class, too American for my lofty European cooking skills. What misplaced arrogance; to this day, I regret selling those pans. Thankfully, N found a ten-inch skillet for me at a church rummage sale, and I picked up my comal, a flat, round griddle traditionally used for making fresh tortillas, at a thrift store. My other two are classic Lodge, a Dutch oven and a grill pan. They’re all pieces I love cooking with.

Cast Iron 03 sml

You can put a little char on your tomatoes!

If you have any cast iron, take good care of it and it will take care of you for decades. Once it’s seasoned, meaning that you’ve basically created a nonstick surface through a combination of cooking fat and heat, never, ever use soap or any other chemical cleaner on it. Don’t immerse it in water, either. I typically just wipe my pans with a dry paper towel, if necessary, but if you’ve got stuck-on bits, you can heat the pan with a bit of water until they loosen, then scrape them out with a spatula. Really tough messes can be tackled with coarse kosher salt and a scouring pad. You can’t scratch them, can’t break them, don’t have to use any fancy utensils. They are indispensable workhorses.

Cast Iron 07 sml

And the most essential thing you can cook in your cast iron Dutch oven…

Cast iron’s greatest advantage, of course, is also its greatest downfall: their weight means they retain heat beautifully, so they get hot and stay hot, and they’re heavy. Treat them carefully and respectfully. Use both hands when lifting; never try to “one-hand” a cast iron pan. When you remove the pan from the oven and set it back on the stove or other protected surface, do as restaurant chefs do and make sure you leave your kitchen towels on the pan to remind everyone (including you) that it’s hot. Large pans that have been heating for a while may take a couple of hours to cool down, so have a safe place to put them where no one will burn themselves. Don’t leave water in the pan, either, as they can rust, though if you find an unloved, rusty specimen, you can always remove the rust with salt and reseason the pan.

Cast Iron 08 sml

…is quite simply the best bread you’ll ever taste.

Want to build your own cast iron collection? Start here, and thanks for buying American. Their stuff is top-notch and remarkably well-priced. Visit thrift stores and garage sales and flea markets (maybe you’ll find my grandmother’s pans?) but stay away from anything called an “antique store.” Little-known fact: antique is actually French for “overpriced stuff bought cheaply in a thrift store and aggressively marked up.” Cast iron’s resurgent popularity in recent years means anything even vaguely vintage can cost a fortune.

Cast Iron 09 sml

And while we’re on the topic of the French and expensive things, this stuff is cast iron too, but with an enamel coating. It’s gorgeous, comes in an array of coordinating colors so the kitchen at your Provencal château can match the Parisian pied-a-terre and it’s priced for really rich people. Tread carefully with these: they’re beautiful and colorful, but you can scratch that enamel without too much effort, and not all of the knobs and handles are designed for high heat. These definitely require a bit more attention, and a lot more money.

Go cook, friends. And save me some cornbread.


Food stamp challenge

One of the comments I hear most frequently in my cooking classes and presentations is that “it’s impossible to eat healthy on a budget.” I wholeheartedly disagree with this statement, and to prove my point, I decided N and I would take part in the Food Stamp Challenge. In Colorado, the challenge is organized by Hunger Free Colorado; your state will have different resources available.

While SNAP (Supplemental Nutrition Assistance Program) benefits vary from place to place and family to family, in Colorado food stamps amount to approximately $4.20 per person, per day. That amounts to $1.40 per meal, if you eat three meals a day, or about $29.40 per week; that number encompasses everything you consume, including drinks and snacks. (Legally, you cannot buy alcohol, tobacco, lottery tickets or non-food products with food stamps, but unfortunately you can buy soda, energy drinks, candy, cakes, chips, cookies, ice cream and plenty of other unhealthy items.) This is going to take some planning, and some smart shopping.

Here’s the tricky bit, though: SNAP benefits can’t be used for any sort of takeaway food, and can’t be used for anything consumed within a store. So no prepared deli items, no to-go coffees, no rotisserie chickens. It’s easy to see why smart hunger relief experts advocate cooking classes along with SNAP benefits; to make the most of this program, you really need to know how to cook from scratch.

Since my household comprises two adults, I’ll allot us a total weekly budget of $58.80. And since I want to play in the most honest way possible, I’ll plan for the way we currently eat: we drink black coffee in the mornings but don’t eat an early-morning breakfast; we typically eat around 10AM and 4PM (it works for us). We also eat very little meat, so going mostly vegetarian won’t be much of a struggle; this budget definitely doesn’t allow for a lot of good meat. And we only eat at restaurants when we’re traveling, so planning and cooking all of our meals at home won’t stress us, either.

Food Stamp 05 sml

Scanning for sales is key to eating well on a budget.

A couple of other caveats about our food stamp challenge:

  • A challenge like this is necessarily a snapshot in time. We’re doing our challenge in December, which definitely makes most fresh fruits and vegetables harder to come by in our Rocky Mountain region – and they’re certainly not local, except for onions and greens! Fresh produce would be more abundant and less expensive in late summer.
  • To play fair, I am not using our backyard honey, or my own canned and frozen goods pantry. I have dozens of jars of applesauce, salsa, Western Slope peaches and other homemade canned goods, plus lots of produce in the freezer, but since I can’t truly ascribe a dollar value to these, we’re not eating these during the challenge.
  • I refuse to dramatically change our standard eating style in order to adhere to the budget; I’m not going to add cheap meat or nutritionally devoid, high-sugar cereal to our shopping list just to have something on the table. That isn’t what we eat now, and I believe the point of this challenge is to make fresh, delicious, nutritious food on a limited budget – not to just eat for the sake of eating.
  • As mentioned above, we’re a household of two healthy adults, and we only eat two meals a day. Your own household’s food stamp challenge will look very different, but we would love to hear about it!

Food Stamp 03 sml

Some of our food stamp challenge ingredients. Embrace the bulk department.

Here’s what I bought for our challenge:

  • 12 oz. whole-bean coffee ($4.99, and it amounts to about $0.12 per cup. Worth every penny.)
  • 12 oz. animal-welfare certified bacon ($4.99)
  • dairy: 1 gal. local whole milk ($2.19), plain yogurt for starter ($0.59), 10 oz. queso fresco cheese ($2.49)
  • two dozen non-GMO cage-free with outdoor access eggs ($5.98)
  • fruit: 3 apples ($0.98), 3 grapefruit ($0.99), 1 lb. grapes ($0.97), 6 kiwi ($0.99), 3 pomegranates ($0.99), 3 pears ($0.98), 8 satsuma clementines ($1)
  • grains and legumes: 0.5 lb. dried black beans ($0.85), 0.5 lb. brown rice ($0.35), 0.5 lb. dried chickpeas ($0.75), 0.5 lb. green lentils ($0.59), 0.5 lb. rolled oats ($0.35), 1 lb. linguine ($0.99), 0.5 lb. white beans ($0.99)
  • 1 lb. organic tofu ($1.79)
  • vegetables: 2 lb. broccoli ($1.76), 1 lb. carrots ($0.69), 1 bunch cilantro ($0.33), 12 oz. frozen corn ($1), 2 cucumbers ($1), 3 bell peppers ($0.99), 2 heads garlic ($0.66), 2 bunches kale ($1.98), 1 lb. yellow onions ($1), 12 oz. frozen peas ($1), 5 oz. salad greens ($1.69), 1 bunch scallions ($0.33), 3 zucchini ($0.99)
  • staples: assorted bulk spices ($1), 0.5 lb. roasted almonds ($2.99), corn tortillas ($0.99), 5 lb. flour ($1.79), 0.25 lb. roasted pumpkin seeds ($1.25), 3 packets yeast ($1.19 with coupon), hot sauce ($0.99)

Total spent: $58.41

Food Stamp 04 sml

Thanks to savvy shopping and the discount table, this is less than $10 of healthy, nutrient-dense fruits and vegetables!

And here is our simple seven-day menu plan; again, we start with a pot of black coffee and only eat two meals per day. For snacks, we eat fresh fruit or raw vegetables, plus a handful of almonds and pumpkin seeds.

  • Day One: yogurt with fruit and almonds; white beans and sautéed kale with fried eggs; fresh bread
  • Day Two: breakfast tacos with eggs, zucchini, peppers, onions and queso fresco; tofu and broccoli stir-fry over brown rice; green salad
  • Day Three: oatmeal with fruit and almonds; pasta with bacon, garlic, zucchini and peppers; green salad; fresh bread
  • Day Four: eggs on toast with sautéed greens; lentil, vegetable and chickpea soup; green salad; fresh bread
  • Day Five: yogurt with fruit and almonds; frittata with vegetables, greens and queso fresco
  • Day Six: oatmeal with fruit and almonds; spicy black bean and corn soup; kale salad
  • Day Seven: huevos rancheros with leftover beans and rice; “favorites” (i.e. everything remaining from the week)

Cast Iron 05 sml

Remind me again why vegetables are boring?

My comments on the week:

  • Our menu wasn’t really that different from what we eat on a regular basis. Each day included at least four servings of various fruits and vegetables and usually more, plus grains and legumes. Virtually everything we ate was healthy, flavorful and made from scratch. We didn’t feel hungry or deprived, but I can easily see how someone accustomed to eating at restaurants and/or eating a lot of meat might find this challenge…well, challenging.
  • I chose bacon as our only meat for the week because it offers so much flavor in even tiny quantities. In addition to adding it to pasta and soups, I also used the rendered fat for sautéing vegetables and greens for extra savory punch. Skipping the bacon entirely would obviously leave about ten percent of the weekly budget for other items, but that’s a sacrifice I’m willing to make. I’d rather eat a small amount of good, flavorful meat than a lot of cheap meat.
  • I made four quarts of my own yogurt from one gallon of whole milk; the starter culture only has to be purchased once since you use a bit of your own yogurt as the starter for future batches. Plain full-fat yogurt made from good milk is a great source of quality protein, fat and calories, and dramatically cheaper than buying it premade.

Food Stamp 07 sml

Does it still count as breakfast if we eat at eleven o’clock?

  • I also baked my own fresh bread as I do now, both for health and economic reasons. Although one could claim that whole wheat flour would be a better choice for homemade bread, I would argue that any homemade bread is far better than what you can buy, and far cheaper. Plus, stale bread becomes croutons and breadcrumbs, which add extra value and flavor; storebought sandwich bread doesn’t go stale, it just molds. (I buy my yeast in one-pound bags for $2.99 from a local restaurant-supply store; this is far cheaper than three packets for $1.19, even with a coupon. If you bake bread regularly, buy your yeast in bulk.)
  • It’s virtually impossible to eat purely organic on a budget this tight. While I appreciate the virtues of organic, with so little money to spend I’d far rather eat more conventional fruits and vegetables than just a few organic ones. Value for money wins here, although some of the discounted produce was organic.
  • I did miss having access to a well-stocked pantry, specifically various oils, vinegars, cooking fats (including good butter), seasonings and condiments. It’s very easy to make delicious, healthy food by just dressing it up a bit, and citrus, spices and other flavor enhancers really come in handy.
  • I also really missed cheese. We eat a lot of cheese, both on its own and as a garnish for vegetables and grains, and while I love queso fresco, I really enjoy using a variety of specialty cheeses in almost every meal. Plus, good cheese can often be found at a discount at our grocery store, too!

Food Stamp 02 sml

Because we’re obsessed with aesthetic perfection and meaningless sell-by dates, it’s easy to find supermarket bargains.

Tips for success for your own food stamp challenge:

  • Flexibility is absolutely key. I bought what was on sale, rather than what I necessarily wanted. If you’re going to cook well on a budget, pay attention to store advertising circulars, clip coupons and learn to adjust your meal plan based on what’s available at a good price, rather than what you feel like eating.
  • Our local grocery store has recently started selling blemished or undersized produce at a discount. This produce made all the difference in our food stamp challenge; most of our fruits and vegetables came from this table, usually packed at three for $0.99. I also always search for items close to their sell-by date that the store is looking to offload at a discount; I’ve purchased a lot of healthy, cheap and still-good food this way (see photo above). Don’t ignore this option if you’re cooking on a budget.
  • Also, don’t ignore frozen vegetables. They are cheap, healthy and easy to have on hand, plus they were frozen when that vegetable was actually in season. Fresh vegetables aren’t always the best option, especially on a tight budget.
  • Shop the bulk department for grains, legumes and spices; skipping the inflated packaging makes a huge difference in price. Dried beans are far less expensive than canned, and they don’t contain excess salt, either. Soaking beans overnight takes virtually no time and a slow cooker makes preparing healthy food easy.
  • Search out local ethnic markets. I could have spent substantially less on produce and beans if I had gone to any one of our incredible Mexican markets here in Denver. I wouldn’t buy animal products there, but I’d definitely buy pantry staples.

Food Stamp 01 sml

Pasta is oft-maligned, but it is quick, inexpensive, filling, and most importantly easy to pack with lots of vegetables.

  • Get a good knife and a good cutting board and learn how to prep your own fruits and vegetables. Paying for the precut product costs a lot extra and it’s already started to deteriorate, too.
  • Think nutrient-dense and lots of color: discounted spinach, sturdy kale or purple cabbage rather than cheap but nutritionally vacant iceberg; black beans over pinto beans. Whenever possible, choose the most intensely colored whole food (that Windex-colored Gatorade does not qualify).
  • And think high flavor, too. I used small amounts of bacon, sharp, salty queso fresco and crunchy nuts and seeds to add a lot of flavor and texture to our dishes. You don’t need much, but they add interest. I spent money on onions, garlic, scallions and cilantro, both because they’re healthy and because they add a ton of flavor and punch without spending a fortune. Growing your own fresh herbs is a great way to enhance your meals.
  • We had quite a bit of food remaining at the end of the week (both prepared and raw ingredients); this is partially why our final day incorporated “favorites.” If you want to eat on a budget, you have to make use of leftovers, too. Throwing away food is exactly the same as throwing away money.

Food Stamp 06 sml

Garlicky white beans and kale with fried eggs: pretty much perfect, in my opinion.

N pointed out that this challenge was easy for me, because I know how to prepare healthy, delicious food and enjoy doing so. While that’s certainly true, I would say yet again that the number-one best thing you can do for both your physical and your financial health is to learn how to cook, and cook often – whether or not you’re on a strict food budget. Take responsibility for your own health, and cook yourself some wholesome, tasty food. You don’t need to break the bank to do that.

If you choose to organize your own food stamp challenge, please share it with us!


Enough

Back in the Ye Olden Days, N and I worked on boats. One of these boats – the one we met on – was a scuba diving liveaboard that plied the waters between St. Maarten and St. Kitts, in the Netherlands Antilles. Much of our history together, along with thousands of other people, was erased earlier this year with the landfall of Hurricane Irma. The island we knew so well doesn’t exist any longer.

Thanksgiving magazines

Every year, they promise the PERFECT Thanksgiving. And every year, we buy it.

On this particular dive boat, there were as many as eighteen guests and eight crew. I cooked, and N guided dives. And because provisioning in the Caribbean is never easy, the weekly menu was set by the home office, and it was the same, week in and week out. We had Taco Night, and a barbecue, and because most of our guests were American, every Thursday was a full Thanksgiving spread. Because – trust me – there is nothing you want to eat more in the middle of a humid Caribbean July than the heaviest meal known to man. Every. Single. Thursday.

Thanksgiving turkey ad

We’re so rich in this country that we will give you a free turkey!

I’ve cooked well more than fifty full Thanksgiving meals in my time on this planet thus far, and I’d like to state here and now that I am done. Unsurprisingly, N cannot stand the meal either. I’ve talked about this before in my classes – how much I really, really loathe this season – but this year, it’s worse than ever. I simply cannot embrace the excess. The waste. The sheer, utter, obscene overconsumption just for the sake of pointless tradition.

Stone Barns-11.jpg

Over two hundred million pounds of food will be thrown away on or shortly after Thanksgiving. The USDA conservatively estimates that over one-third of all turkeys raised for this one day will be thrown out, uneaten. These animals lived a horrible life and died for nothing. This is the season both for abundance and for waste, when we’re both begged to donate to hundreds of needy charities yet told at every turn that we need to buy more, eat more, consume more. I can no longer support America’s most gluttonous holiday: we’re the only country in the world that celebrates Thanksgiving, and we do so with such little regard for the shocking overconsumption that we promote to the rest of the world. And then there’s the day after Thanksgiving.

NJB_1413

Because nothing says “giving thanks” like buying a bolt-action rifle on Black Friday.

A holiday devoted to proudly eating oneself into a “turkey coma,” followed by camping out so we can buy ever-larger televisions or the latest iPhone? Or a new gun? What is there to celebrate, honestly? While this holiday may have actually originated as a rightful celebration of having enough, now it’s about having more. More of everything. More food, specifically the dishes we just “have to have at the table.” You know, Aunt Mildred’s casserole that everyone secretly hates but it’s tradition. And so it sits there, congealing, and is quietly thrown out at the end of the evening because no one, no one wants to take it home. Or the two meat main courses, because everyone really needs both ham and turkey. And everyone really needs eight different side dishes. And everyone really needs three desserts. And everyone really needs to throw all this excess food away on the Sunday evening after Thanksgiving because, quite frankly, everyone is f*ing tired of looking at it.

Turkey.jpg

How about this year, we declare it enough. We have enough. Enough food. Enough electronics. Enough guns. Enough unused things in our house collecting dust. How about this year we agree to eat less, to buy less, to not feel sick at ten o’clock at night while we’re camping out at Bed Bath & Beyond. How about this year, we don’t worry about what do with all those leftovers because we just cooked enough. How about this year, we just decide that what we have is enough. And how about we leave it at that.

Eating healthy on the road

Oh, the quintessential American road trip. Our country’s iconic open highways have been immortalized in so many classic movies, like when we thought “the Rocky Mountains would be a whole lot rockier.” Or perhaps you need to bootleg a few Coors Banquets from Texas to Georgia? Maybe two legendary ladies in a ’66 T-Bird is more your style? Whatever your favorite road trip film might be, there is no arguing that eating healthy while driving American highways is no easy feat.

IMG_20171014_101120147

Hello Wyoming, and thanks for inventing cruise control. (Photo may have been taken in 1987 or 2017. With filters, who knows?)

I like to move food. It’s my thing. Whenever we leave our house, it’s a guarantee that there are a few canvas shopping bags and maybe a plastic tub or two stacked by the door. We go to my sister’s for dinner and I bring jars of homemade applesauce, fruit leather for my niece (also known as “repurposed jam”) or gorgeous cheese from these lovely folks. My book club ladies leave with end-of-the-garden produce, dinner leftovers and more cheese. And if we’re off on a trip, whether by car or by plane, I simply will not be held hostage by the American industrial food complex.

IMG_0764

Mmmm…McDonald’s or Cinnabon? Why not both?

The vast majority of food in this country is based on two key ingredients: corn and soy. We are very, very good at growing corn and soy, and even better at turning it into cheap meat, soda and processed food. And these “edible foodlike substances” are most of what’s on offer at your standard convenience store or truck stop. And to add insult to injury, it is absurdly priced! I will not play by those rules.

IMG_20171016_204714

Example A, above. Look! It’s a $2.79 “meal replacement bar!” You know, so we don’t have to eat an actual meal! Can you read the first ingredient? It’s soy protein isolate. The second ingredient is sugar, and the third is soluble corn fiber. If all of your standard meals are composed of soy, sugar and corn, then by all means, please choose this as a meal replacement. But this is just one of many examples of a giant, powerful marketing machine that has convinced the American public that we 1. don’t have time to cook and 2. can eat some junk like this with “PROTEIN” printed in large font and call it a meal. No, no and no.

IMG_0760.JPG

Absolutely no actual food was harmed in the making of these edible foodlike substances.

If you’re on a road trip, whenever possible get off the highway and into a town supermarket. Gas stations, convenience stores and truck stops are by their very nature stocked with cheap, non-perishable food, so that’s what you’ll buy. Their staff has neither the time or inclination to stock and then dispose of fresh fruit, vegetables and meat, so instead you’ll encounter a display like the one above. If you can make it away from the interstate and into a small grocery store, you’ll hopefully have access to a much better selection of food.

IMG_20171015_122515762

I genuinely pity the poor animals who died to make these “meat sticks.” (Also, “thungry?” Is this like “hangry?” Notice that it’s trademarked.)

NJB_0687.JPG

Part of our road trip survival kit.

So what’s a person to do in the face of this pretend food trash? Easy answer: plan in advance. Just like cooking healthy food at home, eating well on the road requires a bit of time and planning. But if you’re already doing other pre-road trip tasks like checking your tire pressure and refilling your windshield wiper fluid, why not get some healthy food in order? For me, it’s mostly shelf-stable items, plus a few perishables in a cooler. My basic road trip essentials, most of which are easily found in the bulk section of a good supermarket:

  • stellar cheese and good crackers are mandatory
  • dried fruit, including figs, apricots and homemade fruit leather
  • fresh fruit that can last, such as citrus and apples (no berries or bananas!)
  • homemade granola, to eat on its own or with purchased yogurt
  • jerky, either homemade or from well-raised animals
  • nuts, which for us are typically roasted salted almonds
  • rice cracker mix, pretzels or other reasonably healthy salty snacks
  • homemade granola or energy bars, or packaged bars with clean labels (be able to pronounce and understand every single ingredient, and the first three ingredients shouldn’t be soy, sugar and corn)
  • good-quality dark chocolate, preferably without soy lecithin

And for equipment:

  • without question, a good chef’s knife and paring knife, protected in sheaths, and a small polypropylene cutting board.
  • we bring our own coffeemaker, grinder, beans and mugs. We sleep cheap, and I’m not drinking Motel 6 coffee. Not negotiable.
  • cutlery rolls, which include an inexpensive metal fork, knife, spoon, reusable straw and corkscrew. We don’t use single-use items, with the exception of compostable paper napkins.
  • Mason jars with screw-top lids and a few plastic containers. These can be used for drinks, storing snacks or to eat meals.
  • a wooden spoon, rubber spatula and metal tongs
  • a small electric burner plus a frying pan and mini stockpot. This makes meal prep on the road easy – and more importantly – possible.

In all honesty, at various stops along this trip I did notice small containers of cut fresh fruit, hardboiled eggs and some seemingly fresh sandwiches and wraps, which indicates that demand is shifting. But there is no guarantee that every gas station will have these, and if you pack your own food you’ll have a much better selection and save a ton of money. I saw two packaged hardboiled eggs priced at $1.99; with a cooler and ice packs, a dozen well-sourced hardboiled eggs, flaky salt and hot sauce can easily be brought along for about $4 and a few minutes’ work in advance. There is simply no one thing you can do to improve both your physical and financial health more than planning, cooking and bringing your own food. Enough said.

Friends, please remember that your health is your responsibility, and what you choose to eat makes a huge difference in your health. Take some time prior to your next trip and bring food along, and stand in opposition to a system that insists you have to eat what it offers.


On the road again + best travel tips

It’s early October, cool and crisp. N and I have been home from our round-the-world adventure for about four months, and it’s time to go again. We’re at the moment in a flurry of last-minute preparations to head to Oregon for a month, where we’ll volunteer on another goat dairy. This trip is quite a bit easier than the last one: no worrying about visas or passports, no cramming everything into just one bag, plus we’ll only be gone for one month, instead of five. But in the spirit of adventure, we thought we’d share some of our most useful travel tips, gleaned from nearly two decades (!) of short- and long-term travel.

Travel Books.jpg

There are vacations, and then there are trips. One could argue that a trip is a bit more serious than a vacation; it might last for more than a month and involve a committed disentanglement from the everyday world. And nowadays, with opportunities for remote work increasing, it’s more likely that you might be able to swing that four-months-or-more abroad plan you’ve been ruminating on for ever so long. Below, our most useful tips for those of you who might be thinking about making the leap from a standard holiday to a trip.

  • Identify – roughly, at least – what you expect to get out of your travel. If you’re just traveling to capture Insta followers or get paid for blogging, fair enough. Or if you’re running away from a difficult situation, be honest about that, too. But don’t go traveling without at least a reasonably clear idea of what you hope to accomplish. Any less, and you’re asking the travel itself to do all the work. You have to show up, too.

Travel Blur.jpg

  • Make a budget. Then increase it by 25%. The old adage goes like this: “Lay out everything you think you need. Then take half that and twice the money,” and it holds true. For our five months overseas, we budgeted generously for two adults and still went over that number by 20%. They may say that the best things in life are free, but the truth is that travel costs money, and there is no glory in arriving back in your own country completely, totally broke. Account for the unexpected; for us, that was the high cost of point-to-point travel in Japan and unexpected gratuities required literally everywhere in India.
  • Ensure your passport is valid for at least six months beyond your return date. This seems like a surprisingly obvious tip, but you’d be amazed at how many travelers are caught out by it. Different countries have different requirements, but having at least six months’ validity, plus at least three or four blank pages, in your passport will make border crossings much easier.

Travel Diary.jpg

  • Please, research your destinations – and their visa rules – before you go. Again, different countries have different requirements and all of this information can easily be found online, most likely through your home country’s government. “I didn’t know” is simply not a valid excuse at any international border crossing.
  • Also, do a bit of research on your destinations and their customs. In many countries, it’s not appropriate to show shoulders and/or knees. Women might be expected to cover their heads. Certain countries may only eat with the right hand. Knowing this in advance can save a lot of awkwardness once you arrive, and you should always, always be respectful of the customs of the country you’re visiting.

IMG_20171011_095945299.jpg

  • If possible, sign up for a debit card that reimburses ATM fees. In the U.S., Charles Schwab provides some terrific options that can save you a lot of money. Find out if any banks in your country offer similar programs because ATMs are simply the very best way to withdraw local currency and avoid usurious fees. Money changers – especially in airports and train stations – should be used as an absolute last resort. (Thanks, India, for only having broken ATMs in your airports so we were forced to use money changers.)
  • Get travel insurance, and know its limitations. There are a number of great plans out there, but they vary enormously based on your home country and where and how long you plan to travel for. Do your research and don’t skimp on the essentials, and make sure you understand what will be covered if you’re required to be repatriated to your home country for additional treatment. Oh, and know that you’re rarely, if ever, covered for high-risk activities like skydiving, bungee jumping and so on.

Travel backpack.jpg

Five months in just one backpack each.

  • Pack less than you think you need, and buy your travel clothes at your local Goodwill or op-shop. It sounds counterintuitive, but you actually need far less for travel of more than two weeks than you do for a standard holiday. Bring some concentrated biodegradable laundry soap, and get used to washing your smalls in a hostel sink. Pegs and a simple washing line come in handy, too. Don’t take any article of clothing that you absolutely treasure – my favorite jumper is lost forever somewhere on an Indian train, or hopefully keeping someone else warm. You can always buy things on the road and donate what no longer serves you.
  • Ziptop bags, duct tape, safety pins and a small sewing kit are absolute necessities. If there is one thing that long-term travel teaches you, it’s to be resourceful with what you have. Especially if you’re traveling extensively in underdeveloped countries, you’ll find that things we take for granted at home aren’t always available. Being able to successfully repair your own kit is good for the wallet and the psyche.

TajMahal 1.jpg

Oh, this? Just doing a few renovations at our summer cottage.

  • Identify your priorities, and leave the rest to chance. In any country, there will be a few must-sees. Choose your top two or three mandatory sights, and let the rest of your trip happen as it will. Serendipitous travel moments rarely occur when every single second is carefully plotted out.

Above all else, go. Don’t let this or any of the billions of other pre-travel posts out there scare you – just go. There are few experiences in life as enriching as long-term travel and it will change you in ways you never even knew were possible. Grab your passport and your backpack and get out there. The world needs you.


Keep going

Today’s life lesson is simple but essential: keep going. Keep going even when things aren’t working out, when your carefully laid plans have imploded, when you feel like an abject failure at pretty much everything. I’m pretending this is a post about how you should keep cooking even when recipes aren’t turning out right, and it is, but it’s also just a reminder that in life you can either crumple to the ground in a heap, or you can keep going.

Breadsticks

These breadsticks look pretty, but they posed a major risk to dental work.

There exists a perception that professional chefs cook everything perfectly all the time, and I’m here to tell you that this couldn’t be further from the truth. I go through phases where it honestly seems as though nothing in the kitchen works properly. Recipes that should work don’t, recipes that I’ve made hundreds of times without fail suddenly turn out poorly, and nothing tastes right. It would be easy to just storm out of the kitchen.

CCA-94.jpg

This probably boiled over mere seconds after the shot was taken.

Recently, for example, I’ve made three different breadstick recipes with lousy results all three times. I overfed my treasured sourdough starter with whole-wheat flour and increased the acidity so much that it’s like a biological weapon is lurking in my sunroom. In an attempt to use up my pantry stores, I made a Key lime and ginger tart that didn’t set at all, even after six hours in the refrigerator. It tasted delicious, but the presentation was appalling. (There are no photos of this event.)

Apple flatbread 1.jpg

Trying to salvage overproofed pizza dough left over from bread class…

But these occasions are precisely the times when you just have to keep going. When you have to work harder to figure out exactly what went wrong, and how you can improve it next time. When you have to acknowledge that not every single thing you cook will be perfect every time, but trust that the learning is in the process. It’s why I recommend keeping a kitchen journal and taking notes on just about every single recipe you make.

Apple flatbread 2.jpg

…and it actually worked!

We live in an age of immediate gratification. We expect things to happen instantaneously and perfectly, and we no longer know how to fail. This is an especially challenging concept for home cooks, especially people who come to cooking later on in life. Those of us who started cooking young – with this recipe, most likely – remember mistaking a tablespoon for a teaspoon and producing salty, inedible cookies. We laugh about it now and count it as a learning experience. Yet if we made that same mistake as adults, we’d castigate ourselves for our stupidity and perhaps give up on baking altogether, because we didn’t get it right the first time.

CCA-36.jpg

In cooking, as with just about every worthwhile skill, the devil is in the countless hours of practice. No one starts out as a brilliant chef, just as athletes don’t start out as Olympians. When you’re just beginning in the kitchen, you might be disappointed with the results, but it’s imperative that you keep going. You will learn how to season, how to adjust recipes, how to trust your own palate. You will learn how to prepare food that you like and you’ll gain confidence every single time you cook. You will get better. But in order to do that, you have to keep cooking – and that’s tough, especially when perhaps your efforts aren’t received with enthusiasm by your household. (And if that’s the case? Invite your family into the kitchen and make meal preparation a household activity, so that everyone can share in both the effort and the result.)

Tofu Bok Choi.jpg

A very simple tofu and bok choy stir-fry with brown rice…and one of my favorite things I’ve cooked recently.

So please, friends, don’t give up. Don’t get weighed down with disappointment over kitchen experiments that aren’t a roaring success. Keep going. Try something new, fail well, make notes about it and get up and do it again. And above all else, please keep cooking.

P.S. I wrote a guest blog on this very topic over at Healthy Baby Fit Mom! Read more here!

P.P.S. Read a brilliant post about the concept of “constructive growth” and being a “tenacious loser” here; thanks to Karen for sending this link!


How to buy knives

Perhaps this post’s title isn’t exactly the sort of thing you want discovered in your browser history, but we’re going to proceed as planned because it’s important. There is literally nothing that will improve your time in the kitchen more than owning good knives and knowing how to use them. I meet people regularly who tell me how tedious they find cooking; I’m willing to bet that they’re using cheap, dull knives. Most of cooking is actually prepping the ingredients, and lousy knives make this task far more laborious than it needs to be.

CCA-10.jpg

I used to teach cooking classes at a fancy kitchenware store. While I always loved teaching the classes, I failed miserably at the most important part of the job: selling people silly gadgets and pointless equipment they didn’t really need. The spiralizer and the popcorn maker and the banana slicer and the electric egg poacher and the chocolate fountain seem like necessary additions to your already-crowded countertops, I know. But in order to cook well, you need just a few things: a couple of decent, heavy pots and pans (hopefully a cast-iron skillet!), a good cutting board, and well-made knives that suit you.

Wusthof 01.jpg

Knives come in all sorts of expansive sets, like the one shown above. The average home cook has no need for eight or ten or twelve knives, unless you host posh steak dinners for a crowd on a regular basis. I’d far rather you spend the same amount of money on three really good knives: a chef’s knife, a paring knife and a bread knife. Costly, yes. But knives aren’t an iPhone; they’re not designed to be replaced every six months. If you take good care of them, knives can last a lifetime.

Knife Skills

Never buy a knife that you haven’t had the opportunity to hold and cut with. Like tennis rackets or skis or golf clubs, knives come in different sizes and will fit one person better than another. A good knife store will offer demo knives, cutting boards, and fresh herbs or vegetables to cut; make the most of this opportunity and try various knives to see what you like. Knives are broadly grouped into two categories, Western (such as Wusthof and Henckels) and Eastern (such as Shun and Global). The blades and handles are different, and there is no right or wrong choice – just the one that fits you best.

NIK_1540.jpg

Once you’ve spent a couple hundred dollars on knives, please take good care of your investment. Knives NEVER go in the dishwasher or a sink of soapy water; they should be washed and dried carefully after use. The dishwasher destroys knives faster than anything else, and if knives are left in a sink the water seeps into the handle, plus it’s a huge safety risk.

You want to devote yourself to keeping that edge sharp, so store knives properly in a knife block or on a magnetic strip. Throwing knives in a drawer where they can bang around guarantees that you’ll ruin the blade.

Know the difference between honing and sharpening. A honing steel might have come with your knives; watch a basic YouTube video and learn how to hone. Sharpening, however, should be done by a professional at least once or twice a year, depending on how often you cook. A sharp knife makes kitchen prep enjoyable rather than tedious.

Wusthof 02.jpg

Use quality cutting boards made of wood or polypropylene; NEVER ever use knives directly on glass, marble or granite. Knives shouldn’t be used to hammer, pry or stir ingredients, and your knife isn’t a can opener! Never use the knife in a manner that causes the blade to twist, and don’t cut frozen foods with a straight-edge knife – this is a quick way to ruin the edge.

Learn basic cuts (mince, dice, julienne, chiffonade) and understand why each might be used in a recipe. Cutting foods into similarly-sized pieces means ingredients cook more evenly. Always keep ingredients flat and stable when cutting; if necessary, cut a thin slice from one side of the fruit or vegetable to provide an anchoring surface. Lay a damp kitchen towel under your cutting board to keep it from moving on the counter.

And above all else, PRACTICE PRACTICE PRACTICE. The only way to improve your knife skills is to practice them as often as possible. Knife skills are more muscle memory than anything else. Buy inexpensive vegetables and make lots of soups, chopped salads and mashed potatoes!

P.S. Want to learn more? If you’re in Denver, come to my hands-on knife skills class on July 25. I’ll guide you through the classic cuts and you’ll have plenty of opportunity to practice with your own knives and mine too! Details and registration here!

Food politics book club

Our house is filled with books. On shelves, stacked by the bed, in my office…the only place that doesn’t contain any books is the kitchen. N reads a lot of military history mixed with an eclectic selection of farming books and autobiographies, and my choices tend to be modern fiction plus just about anything on food. I feel as strongly about books as I do about food: if they’re not good, I won’t finish them. I have no sense of obligation having started a book; there are simply too many stellar books out there to waste time on the appallingly bad ones. I’ve written before about how choosing books for our trip was one of the toughest parts of packing; I didn’t care at all about which tattered shirts and frayed cargo pants I brought, but I cared a lot about the reading material.

cookbooks-4-sml.jpg

Because I talk a lot about food politics both here and in my cooking classes, I’m often asked for book recommendations. I’ve put together a compilation of some of my favorite books on food politics and America’s desperately compromised food system. Know that there are many more great selections out there, and if you have recommendations for books I haven’t included, please share them! If you’re looking for an even more comprehensive list of some of the best books on food politics, go here.

Cookbooks 1 sml

It is not possible to have a discussion about food politics in America without mentioning Michael Pollan. In my opinion, no author has done more to explain how what was once just “food” evolved into “industrialized agriculture.” I think Cooked is by far his most accessible work; even for me, The Omnivore’s Dilemma and The Botany of Desire get a little…technical. But really, anything by Mr. Pollan is guaranteed to get you questioning your assumptions. And if you can’t commit to reading his books, watch his Netflix series based on Cooked. Plus, his breathtakingly simple manifesto “Eat food. Not too much. Mostly plants.” is by far the best seven-word statement on food I’ve ever encountered.

Cookbooks 2 sml

Four Fish, Paul Greenberg

It is virtually certain that certain species of fish currently used as food will become extinct within our lifetimes; our visit to Japan’s famous Tsukiji fish market simply stunned us with the sheer quantity of seafood caught and sold every single day. There isn’t much positive that can be said about the world’s fishing industry, but this book explains it in a clear, simple manner. (Please, if you’re in the U.S. and you choose to eat fish: consider buying only sustainably caught or responsibly farmed American seafood. Or eat much, much lower on the ocean food chain, like sardines and anchovies. Whatever you do, please don’t buy farmed fish from southeast Asia; their abuse of both humans and the environment makes ours here in the U.S. look positively benign.)

The Meat Racket, Christopher Leonard

One of the best and most difficult books I’ve ever read on our industrial meat supply, The Meat Racket exposes the brilliantly cruel “bracket” system used in modern CAFOs. This book is a carefully researched and shockingly grim portrait of the massive corporations like Tyson currently controlling the vast majority of America’s meat market, and of the farmers trying desperately to stay afloat in a game totally rigged against them. Read at your own risk; you’ll have a hard time buying frozen chicken nuggets after this one.

Fast Food Nation, Eric Schlosser

This book, published in 2001, is subtitled “The Dark Side of the All-American Meal” and could be rightfully argued as the one that started it all. No one really has anything nice to say about fast food in general; it is toxic to the people who eat it, the people who work there, the animals sacrificed for it and most definitely the planet. But it’s great for shareholders…or at least it was, until the fast food industry started slowing down after decades of growth. This is one area where there may actually be something positive on the horizon: fewer Golden Arches across our country.

Cookbooks 3 sml

Twinkie, Deconstructed, Steve Ettlinger

Ever been curious about sodium caseinate? How about modified food starch? Hydrolyzed soy protein? Polysorbate 60? Learn more than you ever wanted to know about how our processed food is made. (Remember, food at home is “cooked.” Food in packages is “processed.”) And we wonder why our gut microbes can no longer handle anything.

The Third Plate, Dan Barber

Last December, N and I had the honor of attending the Young Farmers Conference, held annually at Chef Barber’s Blue Hill at Stone Barns just outside of New York City. I’ve admired and respected this chef since his early days of farm-to-table cuisine; in the professional chef world, he is at the forefront as an advocate for less food waste and a more conscious approach to cooking and food overall. Simply one of my very favorite food books.

Tomatoland, Barry Estabrook

This book sort of pretends to be just about tomatoes and is actually much more about the workers planting and picking them, but it’s still worth a read. We’ve had out-of-season produce in supermarkets for so long that we rarely think about it anymore, but it’s not just the earth that takes a beating – the people do, too. This book almost singlehandedly brought about a very public and (somewhat) successful battle with fast food companies and supermarkets over fair pay for farmworkers; learn more here.

Animal, Vegetable, Miracle, Barbara Kingsolver

Kingsolver might be more known for her fiction, but when she and her family packed up and left Arizona for rural Kentucky, then documented their attempts to eat solely from their own land for a year, the food cognoscenti paid attention. It’s a deceptively simple book (with recipes!) that explains why modern turkeys can’t reproduce naturally and why organic certification is almost impossible for small farms to get and why you should bake your own bread, but there is a lot more under the surface. If you’re thinking about running away to your own piece of land as we are, this book will push you farther in that direction.

Other books I recommend not pictured here (most likely because I loaned them to someone):

The American Way of Eating, Tracie McMillan

Eating Animals, Jonathan Safran Foer

Salt, Sugar, Fat, Michael Moss

Anything by Marion Nestle

Anything by Joel Salatin