There are foods and drinks we should buy, and foods and drinks we should make at home. I would place things like tofu, amazing soft-ripened cheeses, bacon and hoppy IPAs in the first category; though I can make these things, other people are doing a much better job at it. The second category, however, would include granola, bread, salsa, applesauce, hummus and yogurt, among many others – all of these are much better-tasting, healthier and certainly cheaper made at home.
I’ve been asked a number of times recently for instructions on how to make yogurt, and since I make it once a week on average, I thought it might be high time to share this magic with the world. Making yogurt is not difficult or expensive, but it does require a bit of patience and a basic understanding of fermentation – which is typically referred to as “culturing” when used in context with dairy products. Keep in mind that the instructions below are for cow’s milk yogurt; other milks, such as sheep or goat, or non-dairy products, like almond, soy or hemp, don’t turn into yogurt the same way.

Yes, that is the current temperature in our sunroom.
Let’s be clear on what you absolutely do not need to make yogurt: you do not need a fancy yogurt maker, or an Instapot, or specially-purchased mail-order yogurt cultures. You can use these things if you have them, but to me they all fall firmly into the category of “convincing people they can’t cook without expensive gadgets and hard-to-find ingredients.” Peasants have been making yogurt for literally thousands of years; I’m pretty sure they didn’t stop at Bed Bath & Beyond to grab a yogurt maker on their way back from the fields. What you do need: fresh milk, starter yogurt culture, a heavy pot, an accurate thermometer, a ladle, a wooden spoon, clean jars and lids, and a warm, safe place to keep your yogurt while it’s culturing.
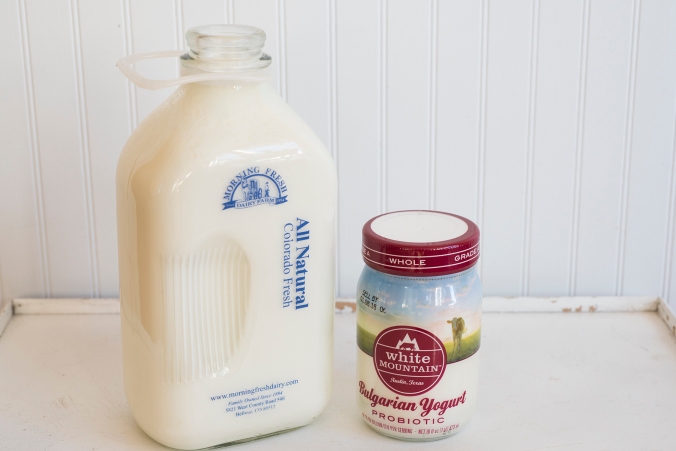
Fresh milk + starter culture = homemade yogurt!
I make my yogurt in one-gallon batches, which yields four quarts plus a bit. If your household doesn’t eat much yogurt, or if you want to start small, make a half-gallon batch. You can always scale up when you realize how much yogurt you’re eating. Don’t buy UHT or other long-life milk to make yogurt or other cultured dairy products; its protein structure has been irreparably changed by the heating process used to make it shelf-stable. And when you’re buying a starter yogurt culture, buy plain, full-fat yogurt; no fruit or other sweeteners, thickeners like carrageenan or pectin, stabilizers or other mysterious ingredients (please, no M&Ms, sprinkles or chocolate chips). Yes, you can use skim or low-fat milk to make yogurt, but why would you? I am an advocate for full-fat dairy at all times; cows don’t give skim milk, so I see no point in consuming it.
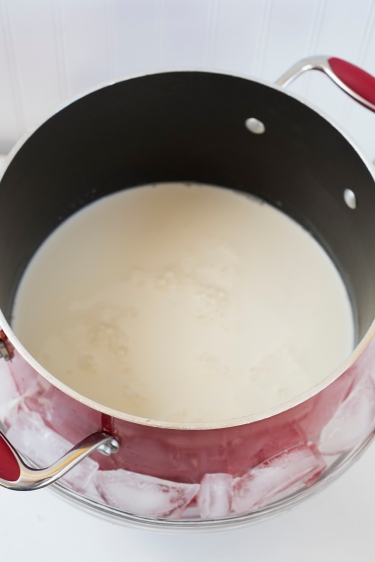
Placing your pot of hot milk in an ice bath will cool it to 110 degrees quickly.
To start, place two tablespoons (for a half-gallon) or four tablespoons (for a full gallon) of starter yogurt into a medium bowl and set aside. Pour the milk into the heavy pot. If your thermometer clips onto the side of the pan, attach it now; ensure the tip doesn’t touch the bottom of the pan or you’ll get an inaccurate reading. Heat the milk gently, stirring occasionally to prevent scorching; you’ll want to bring it up to about 175 degrees F (this could take as long as thirty minutes for a full gallon). Once it’s reached 175, remove it from heat and place it into an ice bath to rapidly bring its temperature down to about 115 degrees F. You can let it cool as is, but icing it is much quicker; stirring it frequently will bring the temperature down, too. (For those of you at altitude, please note that you do not need to adjust these temperatures.)
While you’re waiting for the milk to cool, bring a kettle of water to a boil, and place your clean jars on a folded kitchen towel on your worktop. Fill each jar with boiling water; always wash and warm one more pint jar than you think you need. Place the lids in a separate heatproof bowl and cover those with boiling water, too.
When the milk is around 110 degrees, whisk about one-half cup into the bowl you set aside with your starter culture. This tempers the culture, bringing the two liquids to a similar temperature and ensuring that the starter culture doesn’t cook when it’s added to the warm milk. Now, add the thinned and warmed starter culture to the pot of milk, and stir well. Pour the boiling water out of your first jar, and set it back on the towel. Ladle the warm milk and starter mixture into this clean, hot jar (a funnel comes in handy here). Repeat the process for the remaining jars until you’ve used all of the milk. Put the lids on the jars and close gently; the lids just need to be snug enough to keep from falling off but they shouldn’t be lumberjack tight. Wipe the jars and lids with a clean, damp towel to remove any milk residue.
You can now place the jars into a cozy spot, like a cooler lined with towels, or your (turned off) oven or microwave. The idea is to keep the jars pretty warm, which allows the culture to activate and thicken the milk. I use my dehydrator on a low setting; some people use a slow cooker or even surround the jars with heating pads or hot water bottles. You may need to experiment to figure out what works best in your household; just remember that you’re trying to keep the yogurt reasonably warm and undisturbed. Yogurt cultures love an ambient temperature range of 95 to 115 degrees; the cooler it is, the longer it will take to get a set (but it will still work!).
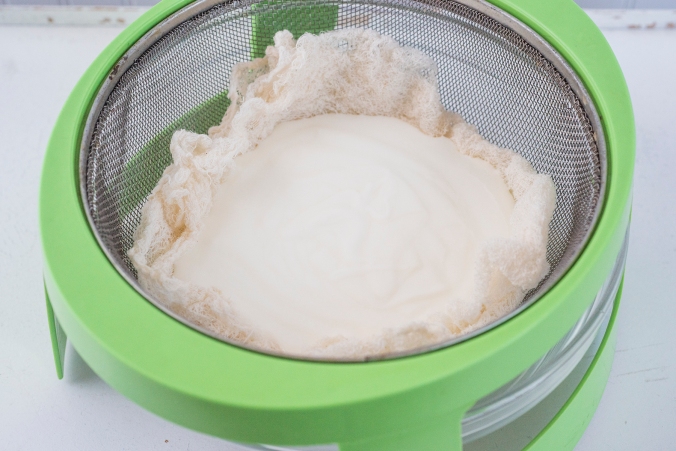
Draining the yogurt in triple-layered cheesecloth will create a thick “Greek-style” yogurt.
I typically leave my yogurt to culture overnight, depending on how much I’m making and the ambient temperature in my house. It will thicken more once it’s been refrigerated, and you can also drain the whey out, leaving you with thick, “Greek-style” yogurt. Drained whey can be added to bread doughs or smoothies, or used as a starter culture for lacto-fermented vegetables, if you’re so inclined. I almost never drain my yogurt, preferring instead to let it culture longer so I have a thicker product and can use every bit of it; when I do have leftover whey I use it to cook grains, like farro and wheatberries. I always leave my yogurt plain so I can use it in both sweet and savory applications; if you want to add in jam or vanilla or honey or maple syrup or any other sweetener or flavoring, do so on an individual basis and not to an entire batch.
Of all the hundreds of batches of yogurt I’ve made, I’ve never had a batch not set. That said, if your yogurt isn’t turning out, I’d recommend first calibrating your thermometer so you know that you’re adding culture at 110 degrees. Too hot and it will die, too cold and it will go dormant. Just like using yeast in bread baking, temperature matters a lot. If you’re confident your thermometer is accurate, I’d next change the brand of milk you’re using, and then I’d change the starter culture, again thoroughly examining that ingredient label to verify that there is nothing in the yogurt besides milk and active cultures. Storebought yogurt has a lot of junk in it; read all your food labels carefully.
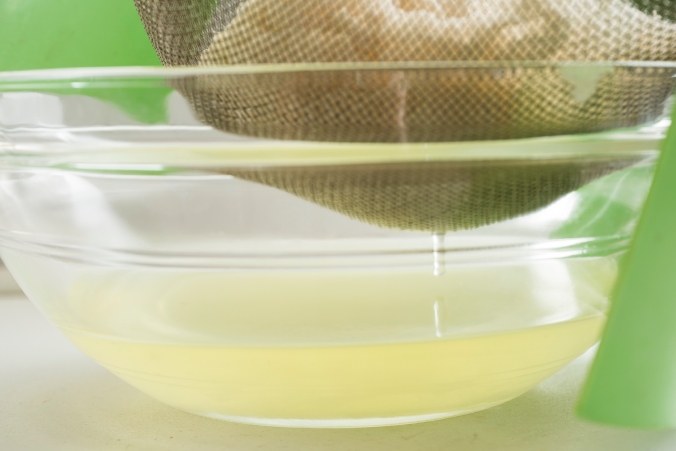
Use the drained whey to bake bread, cook grains or ferment vegetables.
The temperature and speed that your yogurt cultures at determines the thickness of the final product, so once you’ve got the basic technique down, feel free to experiment with how long you let it set, and at what temperature. I’ve read that heating the milk to 195 degrees F allows for an even thicker yogurt because it denatures the proteins further, but I haven’t tried it. Know also that eventually your starter culture will wear out; if you’re making a lot of yogurt, you might find that you need to purchase a fresh starter yogurt every few months to keep your set strong.
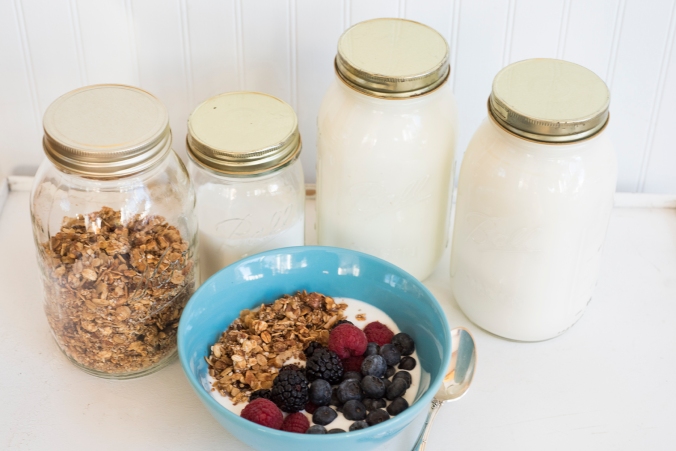
Homemade yogurt, homemade granola and fresh berries. Nom nom nom.
What else should you do with your homemade yogurt, besides enjoy it with fruit and granola? Bake with it. Blend it into smoothies. Use it to marinate meats. Freeze it in popsicle molds with swirls of jam and honey to make your own frozen treats. Add in fresh herbs and salt and make it into a tangy salad dressing or dip for fresh vegetables. Just remember to save a couple of tablespoons to start your next batch!
The picture of a bowl of yogurt looks like what I just had for breakfast, mine had some of my canned peaches. Of all your classes I’ve taken, making yogurt is on top, I make 1/2 gal a week. I’ve made yogurt cheese, my next attempt, frozen yogurt in my ice cream maker. Thank you!!
LikeLike
Thanks, Jim! Glad to hear that homemade yogurt has become part of your household’s cooking routine.
LikeLike
This Mile High subscriber appreciates the mention of altitude. I do have one of those yogurt makers but forget that’s it’s in my life so I buy store yogurt regularly. We’re back home this weekend and I’ll make up a batch thanks to your post.
PS…Reader wish list…a post about each of the other items you mentioned (hummus, salsa, etc.).
PPS…Salad dressing is high on my list for “make, don’t buy”.
LikeLike
Thanks, Amy! I absolutely agree with you about salad dressing – it’s so much better and cheaper to make your own than to buy it. Hope your yogurt turns out great!
LikeLike
Yay and thank you! Question: what is UHT milk and what is not? Is most milk I’m going to find in a grocery store UHT milk? What will the milk label say so that I know it isn’t UHT? Can’t wait to try this. Also sounds like it’s easier in the summer with the warmer weather? Do you just let it keep setting until it’s as thick as you want it?
LikeLike
Hi Kelly, thanks for your comments. UHT milk is typically sold unrefrigerated and it’s almost always packaged in a box or carton (Tetrapak). It’s been heated to ultra high temperatures, hence the name. Fresh milk that you buy out of the cooler will not be UHT, but heavy cream sometimes is. Just look for the label on the front. And you can make yogurt year-round, it just tends to set faster in warmer ambient temperatures. Don’t leave it out for longer than 24 hours, though, or you might find that it’s too sour for your taste. Let me know if you try it!
LikeLike
Great and thank you! I will be trying this soon and will let you know! I love vanilla greek yogurt so plan to add a little stevia and some vanilla to it.
LikeLike
If you do make yogurt, please let me (and everyone else here!) know how it turns out!
LikeLike
Pingback: The FAQ Series: Sugar, Part Two | Finding Quiet Farm
Pingback: Meat your maker | Finding Quiet Farm
Pingback: Farm update: October 8 | Finding Quiet Farm
Pingback: How to make granola | Finding Quiet Farm
Pingback: A fresh start | Finding Quiet Farm
Pingback: Best diet hack ever! | Finding Quiet Farm
Pingback: How to make hummus | Finding Quiet Farm
Pingback: Farm update: March 9 | Finding Quiet Farm
Pingback: Farm update: July 20 | Finding Quiet Farm
Pingback: Preserving season | Finding Quiet Farm
Pingback: Let’s make hot sauce! | Finding Quiet Farm
Pingback: Farm update: May 24 | Finding Quiet Farm
Pingback: Fight inflation in the kitchen | Finding Quiet Farm